
Beach toy photography: How to shoot action figures and LEGO in the sand
How to turn a family beach trip into a cinematic toy photography shoot: golden hour timing, ground-level macro angles, and practical sandstorms. 2026 guide.
This post contains affiliate links. We may earn a commission if you make a purchase, at no extra cost to you. As an Amazon Associate, Dadnology earns from qualifying purchases.
Every photographer who has built an indoor staging rig knows the limits of the studio. In our LEGO toy photography studio setup guide, we spent hours dialing in cross-lighting, diffusers, and smoke machines to create moody cinematic atmospheres. But there is one environment no indoor lightbox or miniature diorama can ever truly replicate: a wide, windswept beach at sunset.
Natural sand dunes offer infinite organic texture. Wind carves geometric ripples across the ground that mirror the vast deserts of Tatooine, Arrakis, or the Gerudo Wasteland. More importantly, when the evening sun dips toward the horizon, natural light provides a warm, directional sidelight that costs nothing and flatters miniature plastic like no LED panel can.
Yet shooting toys in the sand is notorious for frustrating beginners. Action figures constantly topple down loose inclines, white plastic blows out into harsh digital glare under midday sun, and fine quartz sand threatens to grind into delicate camera zoom rings.
On our recent family beach vacation, we packed a selection of subjects — from the rugged 6-inch Hasbro Black Series Sandtrooper to classic LEGO Star Wars and Zelda minifigures — to test what really works. Here is our comprehensive, field-tested guide to mastering beach toy photography, capturing authentic scale, and turning family beach trips into collaborative creative adventures.
📐 The scale illusion: Why low camera perspective is non-negotiable
The foundational secret of believable toy photography is perspective compression. The human brain determines the physical size of an object based on its relationship to the horizon and surrounding terrain. If you stand upright and look down at a 15-centimeter action figure or a 4-centimeter LEGO minifigure on the sand, the figure looks tiny, fragile, and utterly out of place.
To transform a toy into a living character, your camera lens must drop to the eye level of the figure:
- Get down to the ground: Lie flat on your stomach or use an articulating flip-up screen. Your camera should sit no higher than 1 to 3 centimeters above the sand surface.
- Use foreground ripples for depth: Position the camera behind a wind-carved sand ripple. In close focus, a five-millimeter sand ridge reads like a twenty-meter desert bluff.
- Align the horizon: Avoid tilting the camera downwards. Keep the horizon line midway or in the lower third of the frame so the sky crowns your subject, giving miniature characters towering physical presence.
Timing the light: Why midday fails and golden hour reigns supreme
Lighting determines whether plastic looks like a cheap five-dollar supermarket toy or an authentic movie prop.
Direct midday sunlight is the enemy of toy photography:
- White plastic (like Stormtrooper armor or white LEGO bricks) reflects intense specular highlights that blow out camera sensors into clipped pure white.
- Harsh overhead light casts pitch-black, unflattering shadows beneath helmet visors and eyebrows, hiding character facial sculpts.
- Flat light washes out surface topography, making textured dunes look like flat beige cardboard.
The magic happens in the final 45 minutes before sunset. As the sun sinks low, atmospheric diffusion scatters harsh blue wavelengths, bathing the dunes in warm amber and terracotta tones. Raking sidelight skimming horizontally across the ground illuminates the crest of every sand wave while leaving the troughs in soft shadow, generating stunning three-dimensional depth.
Why a 15-centimeter figure rules the beach
Sand betrays scale instantly. Next to a 4-centimeter LEGO minifigure, every grain of quartz sand resembles a small pebble, and a small mound looks like loose gravel. Beside an action figure measuring 15 centimeters tall (almost four times the height), the exact same beach sand looks fine and powdery, wind ripples become towering dune ridges, and a tuft of beach grass reads as an alien bush. The beach no longer needs to be hidden or disguised; it becomes an authentic movie landscape.
The figure’s backstory seals the illusion. In A New Hope, Sandtroopers are Imperial soldiers sent across the harsh deserts of Tatooine in search of two missing droids. A soldier that belongs in the desert, placed in a landscape that looks like a desert: that is half the storytelling battle won before you even click the shutter. The Black Series Sandtrooper excels here because factory sand grime eliminates artificial plastic shine straight out of the box.
Camera, lens, and distance: The telephoto advantage
All of our beach photographs were captured on our Nikon Z8 (with our compact Nikon Z50 II serving as lightweight travel companion) and the 70-200mm f/2.8 S. We shot entirely handheld lying on our stomachs in the sand, without tripods, flashes, or artificial reflectors. Focal lengths ranged from 125 to 200mm, apertures sat between f/4 and f/5, and shutter speeds ranged from 1/250s to 1/1000s.
The telephoto lens is the decisive strategic choice. At 200mm, the lens captures only a narrow slice of the background. Two steps to the left, and a massive dune ridge frames your trooper instead of open sea; one step to the right, and the setting sun sits directly behind his helmet. A wide-angle lens would inevitably drag half the crowded public beach into your frame — complete with beach towels, strollers, and windbreaks. Furthermore, telephoto compression melts distant sand into silky bokeh at f/4 while keeping the figure tack-sharp.
The trade-off: at 200mm, the minimum focusing distance is roughly one meter, requiring you to lie flat on your stomach with comfortable working distance from the subject.
Evening one: Twelve minutes, five scenes
Our first five compositions were captured in a single twelve-minute window between 19:02 and 19:14. During those twelve minutes, the setting sun shifted from warm sidelight to direct backlight resting right on the dune crest. That was our biggest lesson: pristine golden-hour beach light is fleeting. If you only start planning poses when the light arrives, you will end up with two shots. Plan your scene sequence in advance: start with setups that require directional sidelight, and save the direct backlight compositions for last.
Scene 1: Patrol in the dune grass
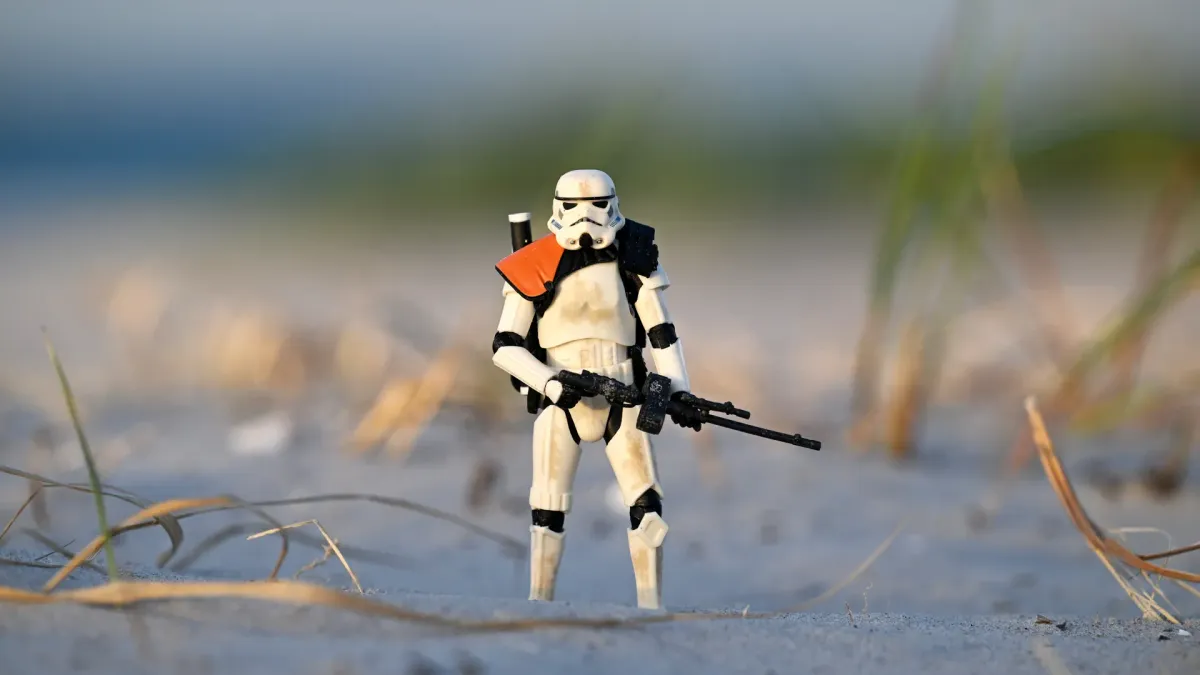
The opening image is the classic patrol setup: the trooper upright, gripping his long blaster in both hands as if reacting to a sudden noise. We positioned the figure with sea grass blades in front of and behind him. Dropping the camera low turns the foreground grass blades into soft, out-of-focus streaks that give the viewer a sense of looking through the brush. Warm sidelight from the right sculpts the armor without blowing out white highlights.
Scene 2: Sidelight on the armor
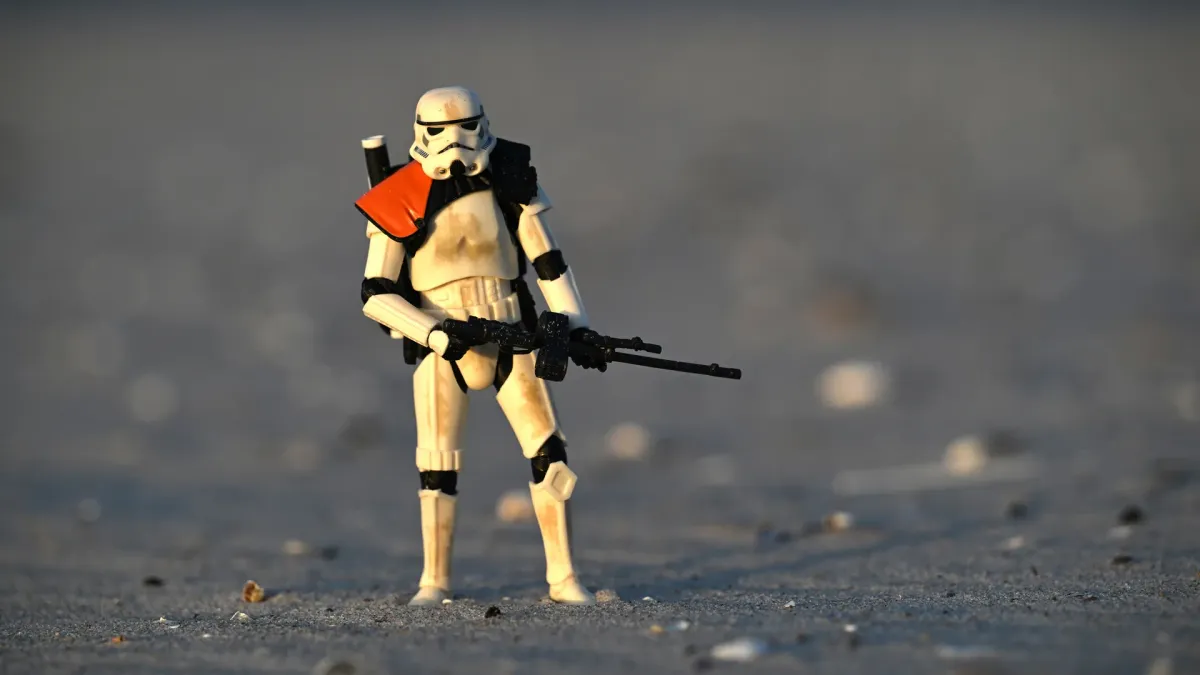
Two minutes later, in an area of darker sand, we focused on highlighting the figure itself. Saturated white plastic is notoriously tricky in harsh light, but with the sun skimming horizontally from the side, each armor plate casts a delicate micro-shadow onto the next. The factory-painted sand grime on the chest and shins pops into sharp relief, giving the plastic the weight of weathered movie armor.
Scene 3: Pause in the dune hollow
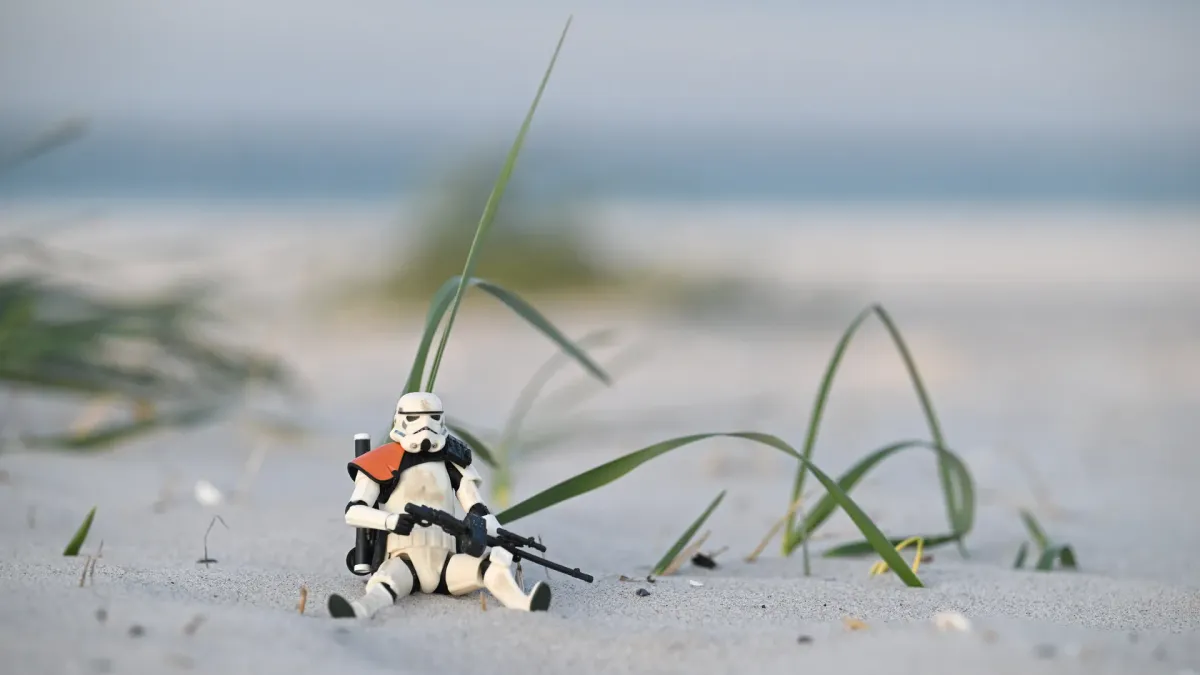
This is our favorite image of the entire series, and it is only possible with a posable action figure. A LEGO minifigure can sit, but it cannot convey fatigue. The Sandtrooper can be seated deep in the sand with knees bent and his rifle resting across his lap. A nameless stormtrooper instantly becomes an exhausted human soldier catching his breath. Notice the ISO 720: as the sun dipped behind the dunes, available light was already dropping rapidly.
Scene 4: Backlight over the dune ridge
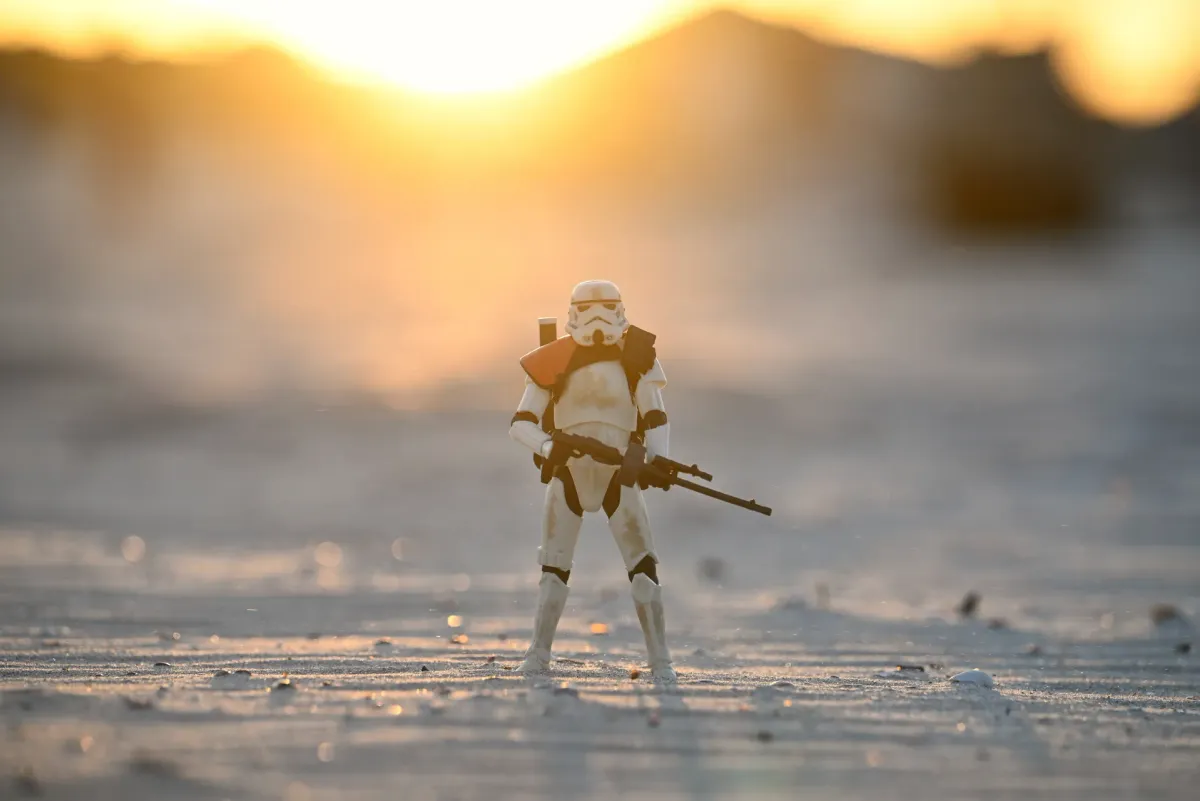
Captured at 19:12 as the sun kissed the dune ridge. Shooting straight into the backlight creates a brilliant golden rim along the helmet, shoulders, and backpack antenna. The shadowed front of the trooper avoids plunging into pitch black because the pale sand in the foreground acts as a giant natural reflector bouncing soft fill light into his chest.
Scene 5: The practical in-camera sandstorm
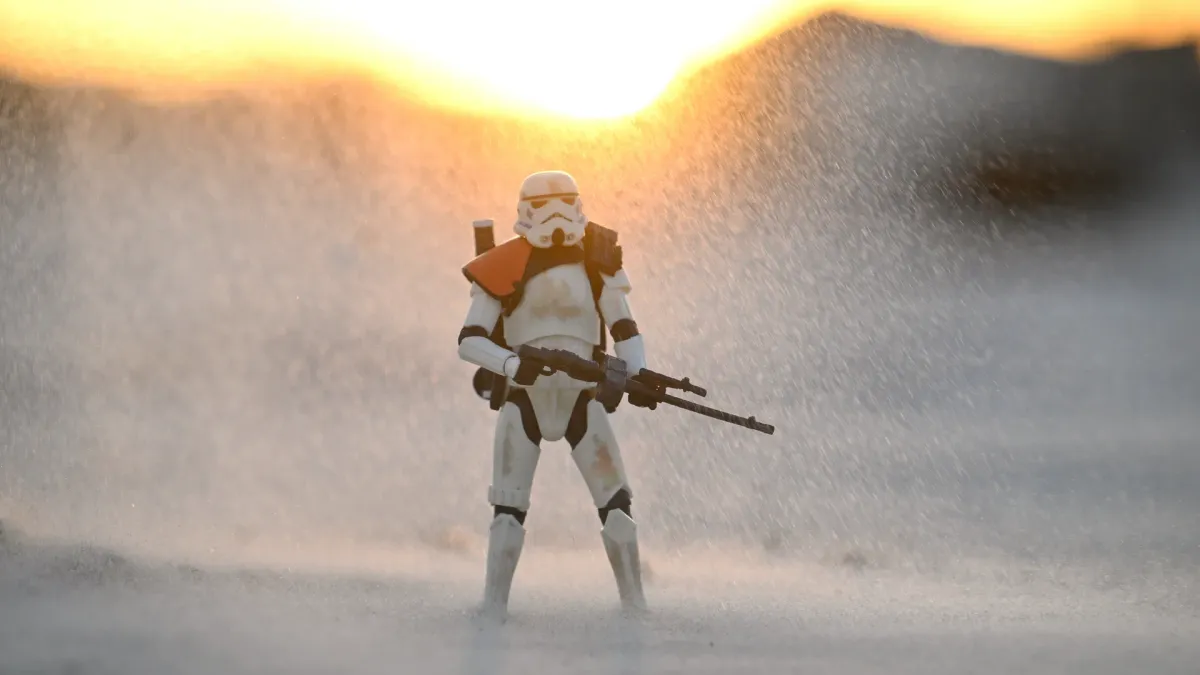
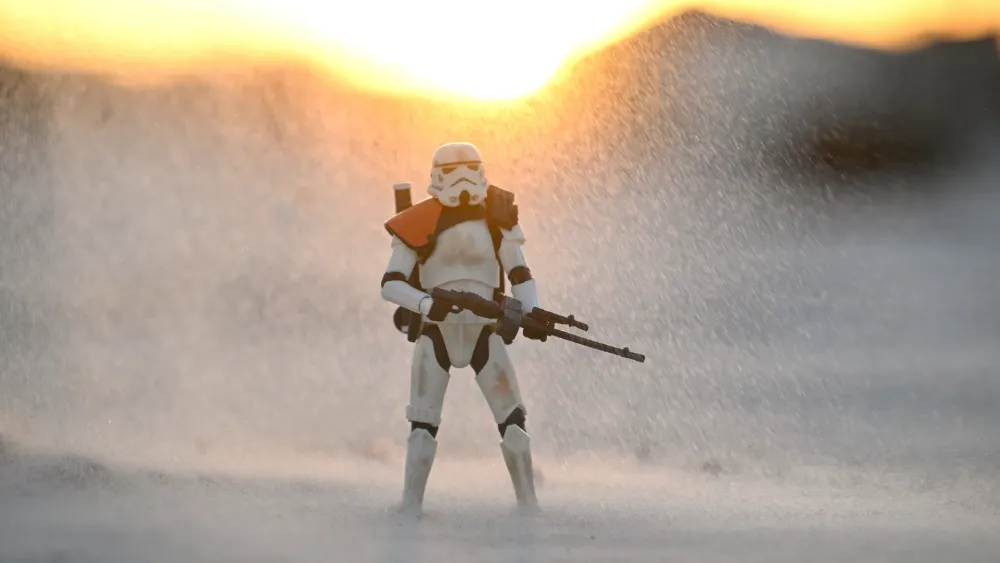
Two minutes after the backlight shot, from the exact same position, we added the sandstorm. Handfuls of dry sand tossed upwind drift across the frame behind the trooper. At 1/800s, the backlit grains freeze into short kinetic streaks that sparkle like golden embers. It is the ultimate father-and-child collaboration: one tosses the sand, the other fires the continuous shutter.
Evening two: Sentry duty and wind ripples
Four days later, we returned to the same dunes with the camera set to f/5 and a 1/250s shutter speed. For the Sandtrooper, we composed two quieter, contemplative setups:
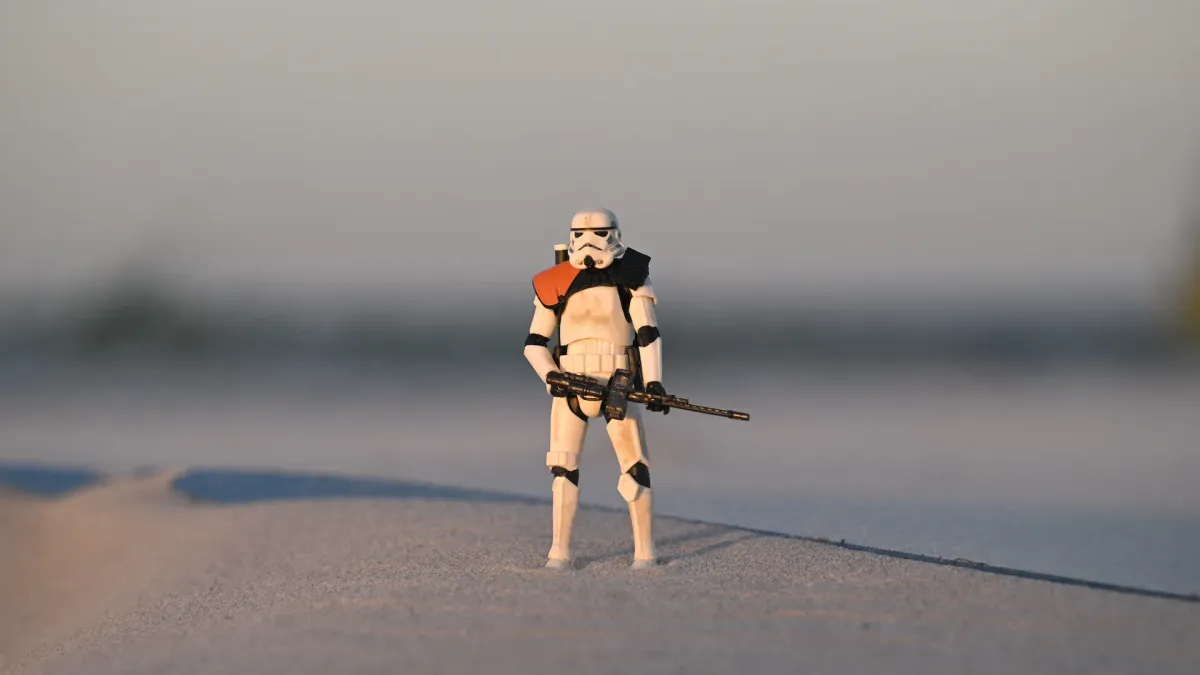
The first was the sentry: positioning the trooper behind a sharp ridge that casts a long diagonal shadow across the foreground. That clean shadow line separates the viewer from the figure and accentuates the feeling of solitude against the soft pastel sky.
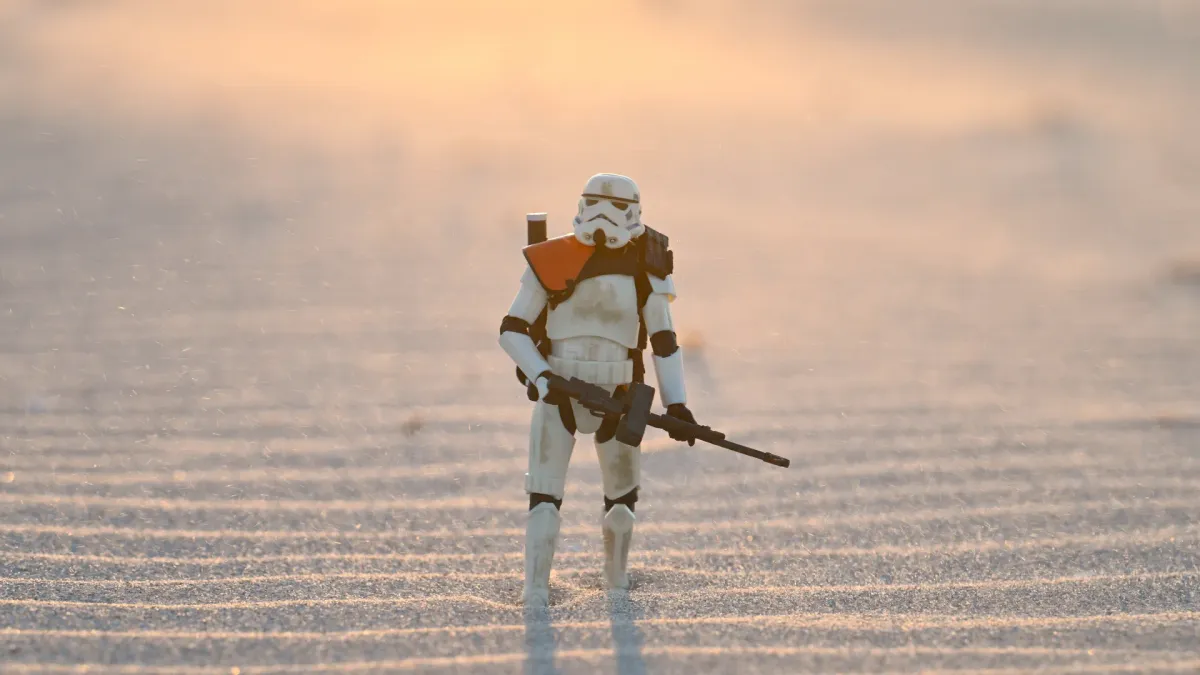
The second was the ripples. Gentle coastal wind had carved clean geometric waves into the sand flat. Stepping back to 125mm allowed us to frame multiple rows of ripples leading directly toward the walking trooper. What would appear as miniature hummocks next to a LEGO minifigure looks like an authentic desert expanse next to the Sandtrooper.
LEGO minifigures at the same beach: Taming the sand
Directly before shooting the Sandtrooper on that second evening, we brought our favorite LEGO Star Wars and fantasy minifigures onto the dunes. The resulting images are striking, but they demanded far more care because of the scale difference:
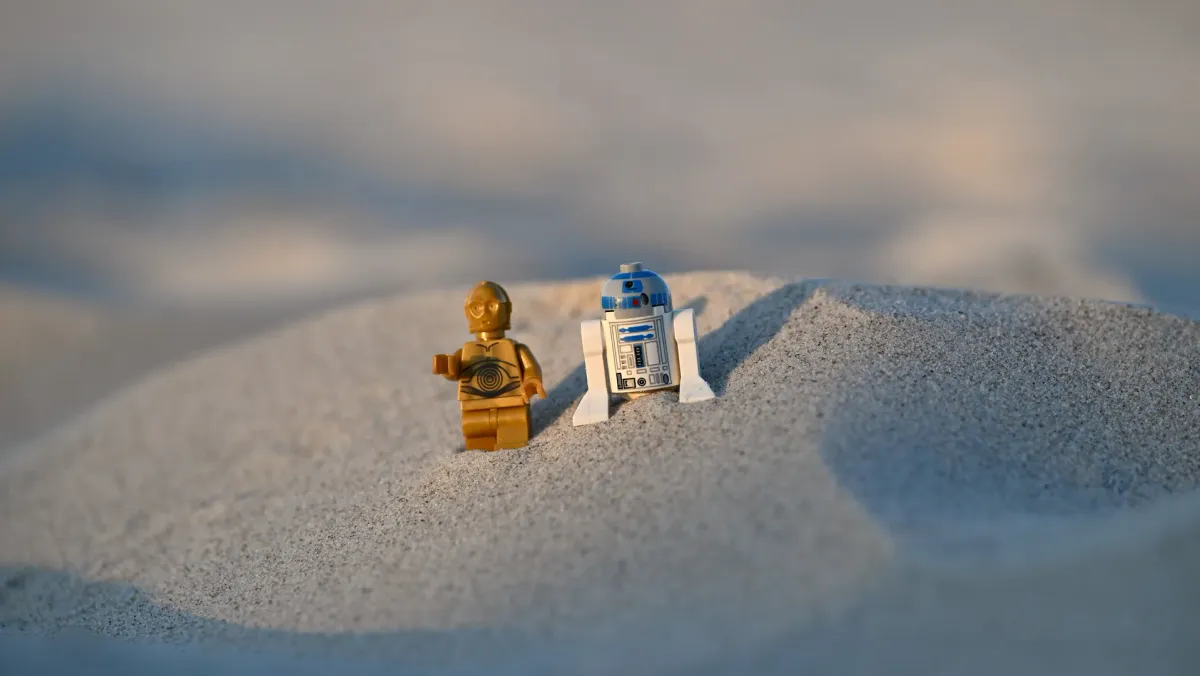
At 4cm tall, individual quartz grains under C-3PO and R2-D2 look like miniature rocks. The image succeeds because the 155mm telephoto lens dissolves the background into creamy blur, keeping focus locked strictly on the droids. Working with minifigures on a beach means actively hunting for the finest, smoothest sand flats and keeping the camera lens within centimeters of the ground.
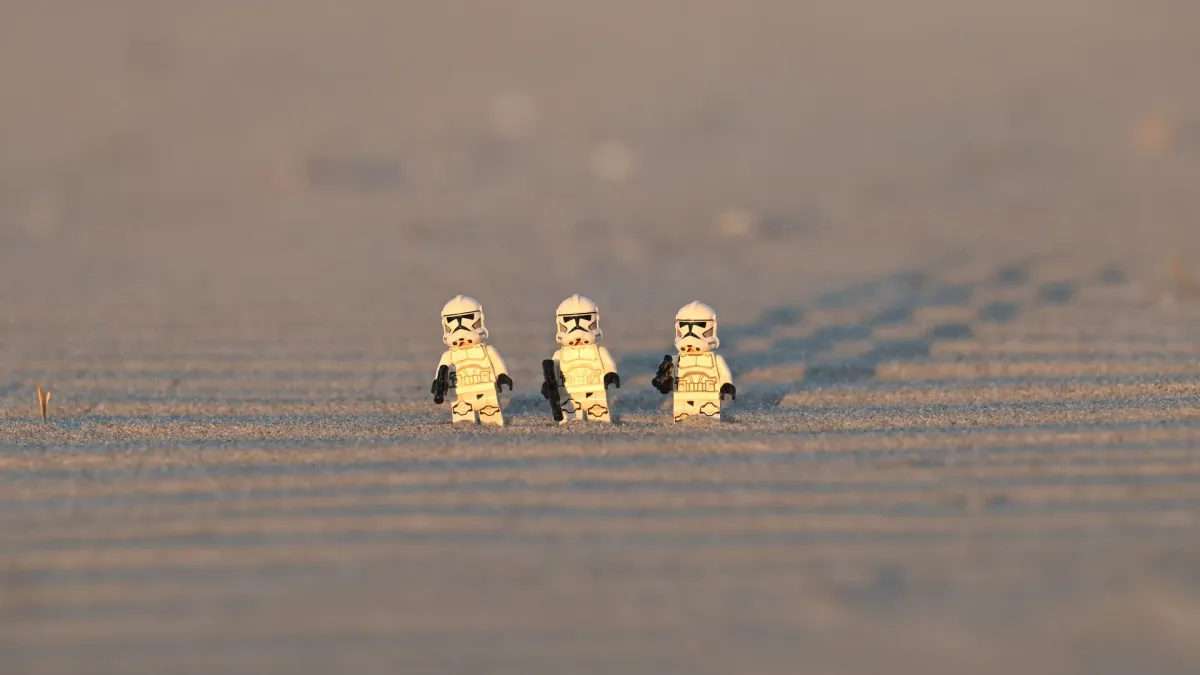
For the three Clone Troopers, fine wind ripples worked in our favor. The crests were small enough to match minifigure scale, and placing the troopers in single file creates compelling narrative geometry.
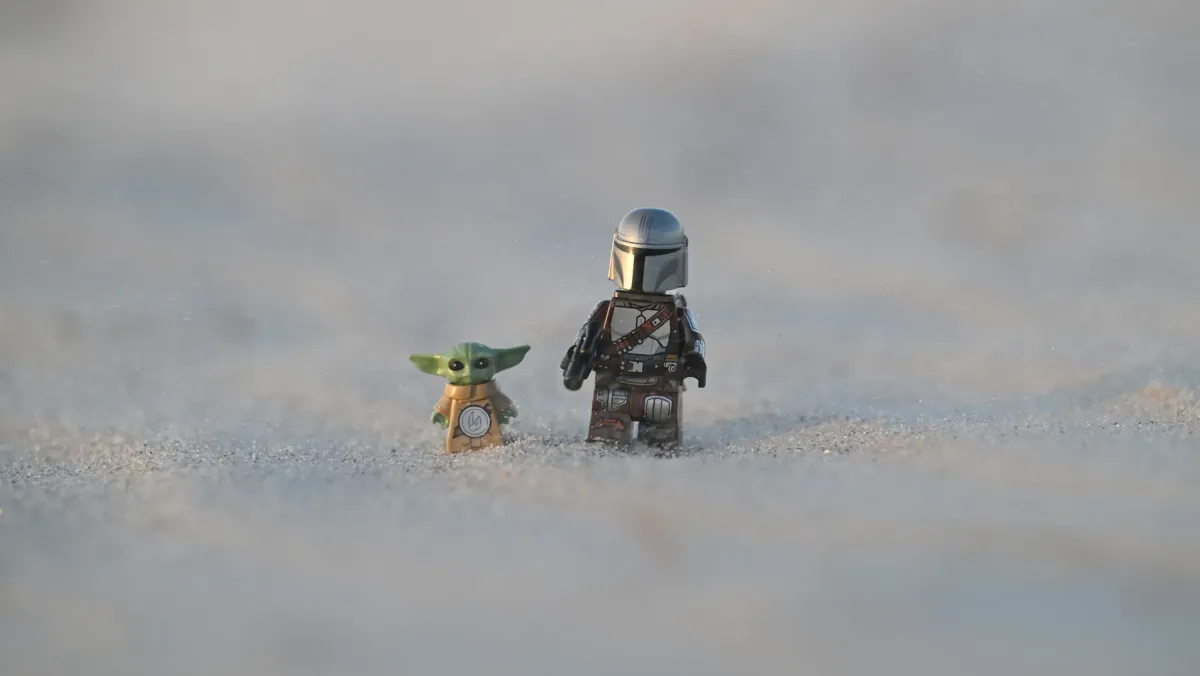
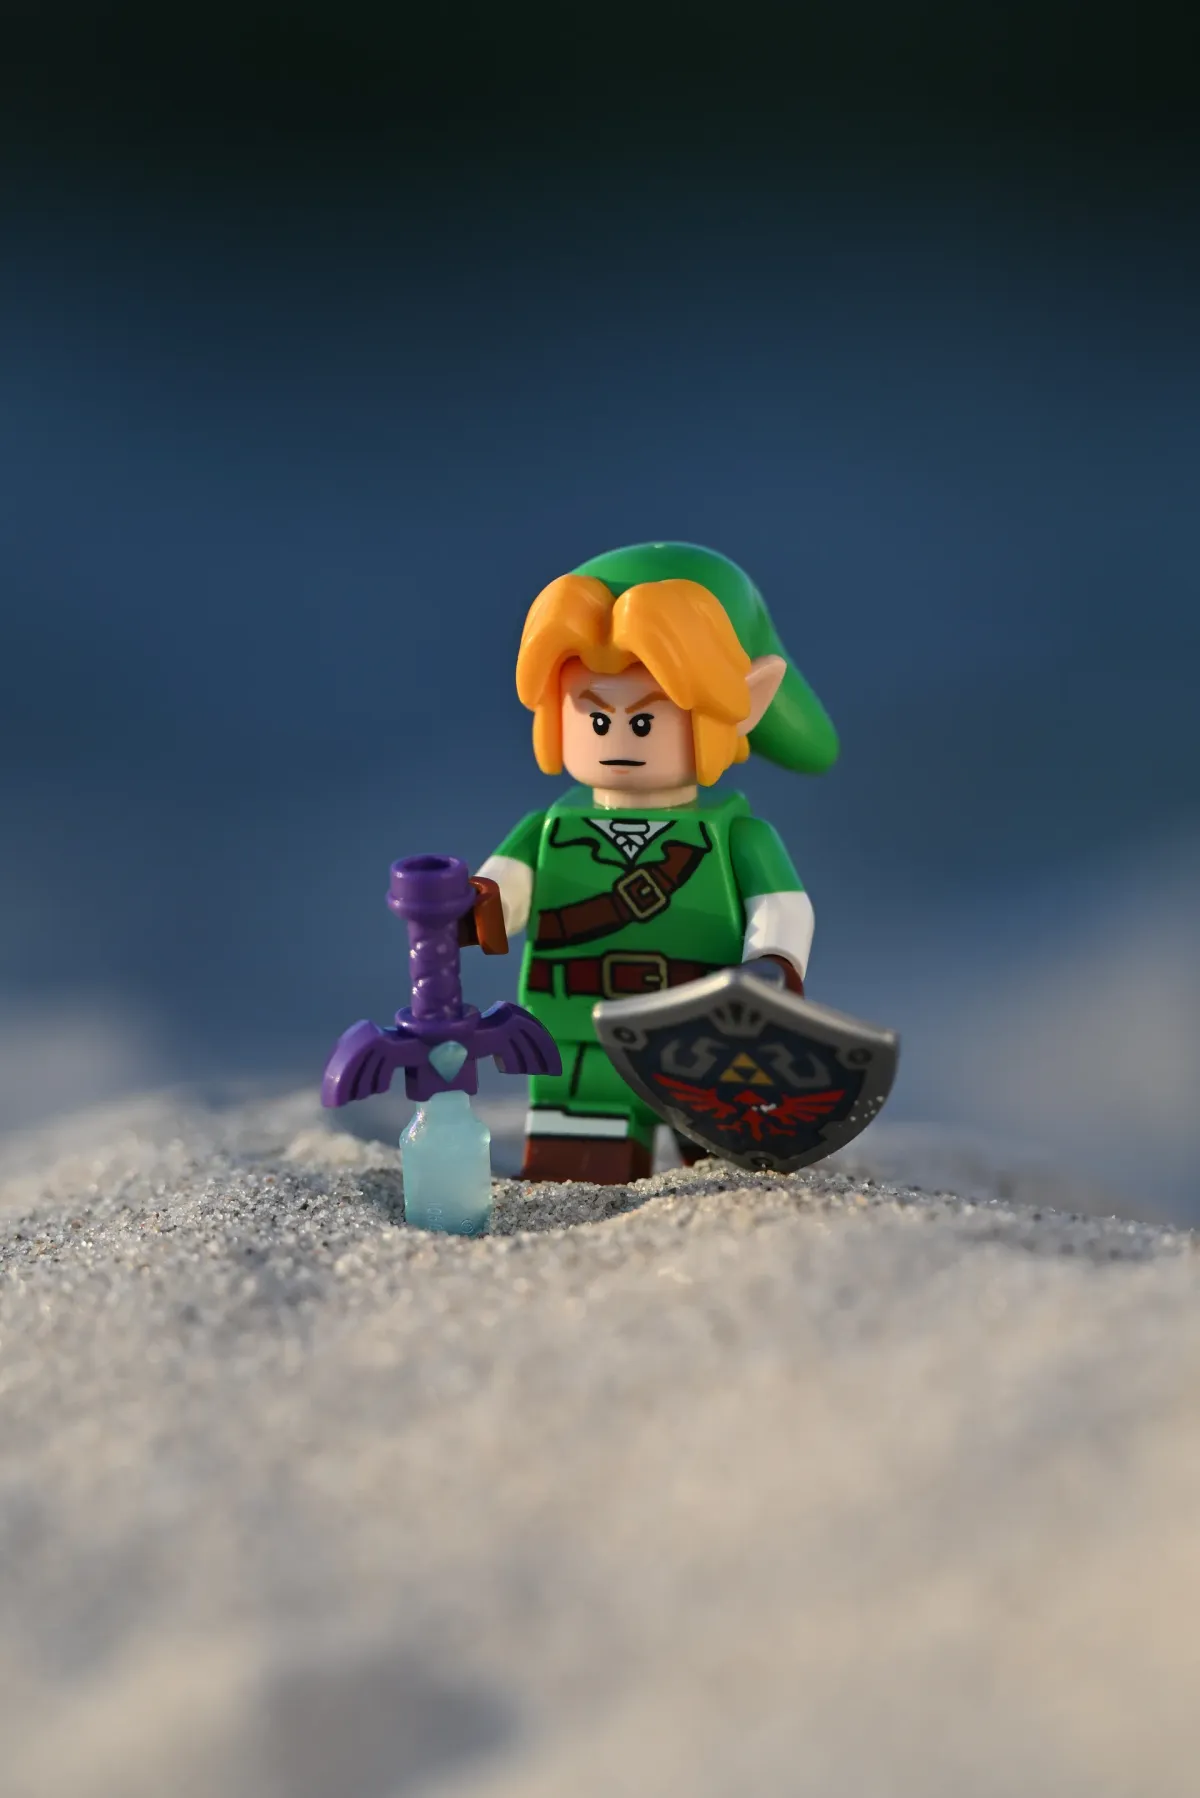
With Din Djarin and Grogu, ultra-fine white sand and soft twilight create an impression of endless distance, matching their wanderer aesthetic. Two days earlier, we also placed Link from The Legend of Zelda in the sand with the Master Sword, evoking the Gerudo Desert:
Camera settings & technical field craft
Shooting miniature subjects in outdoor environments requires a deliberate balance between depth of field and shutter speed.
Aperture: The depth-of-field tightrope
In macro and close-up photography, depth of field shrinks dramatically. If you shoot a 4-centimeter LEGO minifigure at f/1.8, only the tip of its helmet visor will be in focus, while its torso and feet melt into a blurry smear.
- For 6-inch action figures: Set your aperture between f/4 and f/5.6. This provides sufficient sharpness across the helmet, chest armor, and weapon while keeping the background softly blurred.
- For LEGO minifigures: Close down to f/5.6 or f/8. Because your lens is focused just centimeters away from the subject, f/8 will render the entire minifigure crisp while still producing creamy bokeh for distant sand hills.
Focus mode: Pinpoint AF or manual focus peaking
Never rely on wide-area multi-point autofocus in the sand. Modern camera autofocus algorithms tend to lock onto high-contrast sand ripples in front of the figure rather than the figure’s eyes.
- Use pinpoint single-point AF or switch to manual focus with focus peaking.
- Always magnify the electronic viewfinder or LCD screen to 100% and manually confirm that critical focus sits squarely on the figure’s helmet visor or eyes.
Shutter speed & ISO
Keep your ISO at baseline (ISO 64 or 100) to maximize dynamic range and shadow recovery headroom. During golden hour, the low sun provides plenty of light, allowing you to shoot at 1/500s to 1/1600s. Fast shutter speeds eliminate camera shake from shooting handheld on your elbows and instantly freeze blowing sand grains.
🧼 Post-shoot gear care: Sand maintenance protocol
Quartz sand and saltwater spray are the two greatest hazards for delicate photographic equipment. If you handle your gear carelessly, fine abrasive particles will find their way into lens zoom rings, lens mounts, and tripod leg locks.
Follow our strict three-step cleanup ritual after every beach session:
1. On-site pack-down (before leaving the beach)
- Never use a blower bulb on your camera outdoors: Squeezing air on a windy beach can blast airborne sand directly into ports or behind dials.
- Hold the camera upside down: Gently tap the body and lens barrel to let gravity pull loose grains away from seams.
- Seal your figures: Place your sandy action figures and LEGO pieces into separate zip-lock freezer bags so loose grit does not contaminate your camera backpack.
2. Studio camera maintenance (at home)
- Horsehair or soft cosmetic brush: Gently sweep all exterior lens barrels, rubber zoom rings, and button clusters with a dedicated clean brush.
- Inspect the front element: Use a hand blower bulb in a clean indoor room to blow away any dry quartz particles. Only after the glass is 100% free of loose dust should you wipe the element with a lens cleaning tissue and optical fluid. Wiping a dusty lens with a dry cloth will permanently scratch anti-reflective coatings.
3. Washing your toys
- Action figures: Rinse under lukewarm running tap water. Gently work the elbow, knee, and ankle joints while submerged to flush out trapped quartz crystals. Let dry completely on a towel.
- LEGO bricks and minifigures: Soak in warm water with a single drop of mild dish soap. Use a soft toothbrush to clean out hollow leg cylinders and weapon clips, then air-dry on a lint-free cloth.
👨👦 Conclusion: The beach as a creative playground
Toy photography at the beach is more than just a technical exercise in camera settings; it is an incredible vehicle for collaborative family creativity.
Instead of sitting passively on beach towels staring at smartphones, a toy photography shoot engages kids directly with the natural world. Children become location scouts discovering hidden dune valleys, art directors debating whether Link should hold his shield or sword, and special-effects technicians timing windblown sandstorms with the click of your shutter.
When you pack your bags for the next coastal trip, leave room in your daypack for a couple of rugged figures and a reliable camera body. Ours is the Nikon Z50 II; why it is our family travel camera is in our Nikon Z50 II review. When the golden hour sun paints the dunes in amber light, you will have everything you need to create cinematic movie magic right at your feet.
Pros
- Infinite organic terrain and natural wind-carved dune textures create instant movie-scale realism
- Golden hour sidelight eliminates harsh plastic glare and illuminates sand micro-contours naturally
- Practical sandstorm technique produces stunning cinematic in-camera effects with zero CGI
- High engagement for kids as location scouts, prop handlers, and practical effects assistants
- Works brilliantly across both 1:12 scale action figures and 1:45 scale LEGO minifigures
Cons
- Quartz sand and sea wind require disciplined camera maintenance and ground protection
- Golden hour shooting window is short, demanding quick setup and pre-scouted locations
- Loose dune slopes require careful balance adjustment or hidden anchor plates for figures
The Dadnology verdict
Beach toy photography turns ordinary family vacations into extraordinary creative masterclasses. With ground-level macro angles, warm golden hour sidelight, and practical in-camera sandstorms, natural beach dunes offer a cinematic playground that no indoor studio can match.
How do you protect your camera from blowing sand at the beach?
Why do action figures and LEGO look so different in beach sand?
How do you make an in-camera sandstorm without editing software?
Which figures work best for sand and beach photography?
Keep this in your inbox
One email a week: what we actually watched, built and reviewed — the stuff worth a dad's time. No hype, no daily spam.
Dadnology Weekly
One email a week: the LEGO, gaming and movie news worth a dad's time — plus what we actually reviewed. No hype, no daily spam.
Disclaimer: This review and its visuals were created with the help of AI. Some links may be affiliate links – we may earn a commission if you make a purchase, at no extra cost to you.
Current deals in Cameras
Verified live discounts tracked on Amazon

Cameras · Tested by Dadnology
Nikon Z8 Body
5/5“The Endgame body. No more compromises.”Read our reviewPrice as of Oct 13, 09:11 PM UTC

Cameras · Tested by Dadnology
Nikon Z5 Body
5/5“The unbeatable on-ramp to full-frame mirrorless.”Read our reviewPrice as of Oct 13, 09:11 PM UTC

Cameras · Tested by Dadnology
Nikon Z50 Body
5/5“An honest look back at the DX body that started my Z journey.”Read our reviewYou might also like
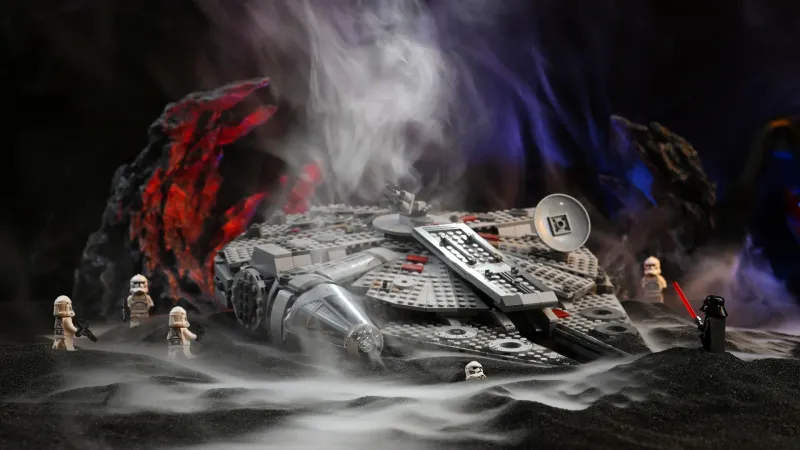
Toy photography setup: How we shoot LEGO sets like movie stills
After reading this guide you will be able to build a tabletop toy photography stage at home, light it so the background disappears, add fog and colored accents for mood, and choose the right lens for the 'looks real' shot — whether you own a full-frame kit or a smartphone.
LEGO Millennium Falcon (75257) review: The dad's Falcon
The definitive Falcon for dads and kids. At 1,351 pieces, set 75257 strikes the balance: accessible multi-evening build, swooshable Technic backbone and full interior play. Retired since the end of 2024, and still a 5/5 classic.

New LEGO sets October 2026: The best picks for dads and kids
October 2026's LEGO wave in one honest guide: the 6,130-piece Executor UCS, four new Avengers: Doomsday movie tie-in sets, and LEGO's first Wednesday Addams sets.