
How to Shoot Long Exposure Water Photography (Real Settings)
The real camera settings behind 8 long-exposure water shots — from a 20-second glass-flat lake to a 1/15s waterfall, explained step by step.
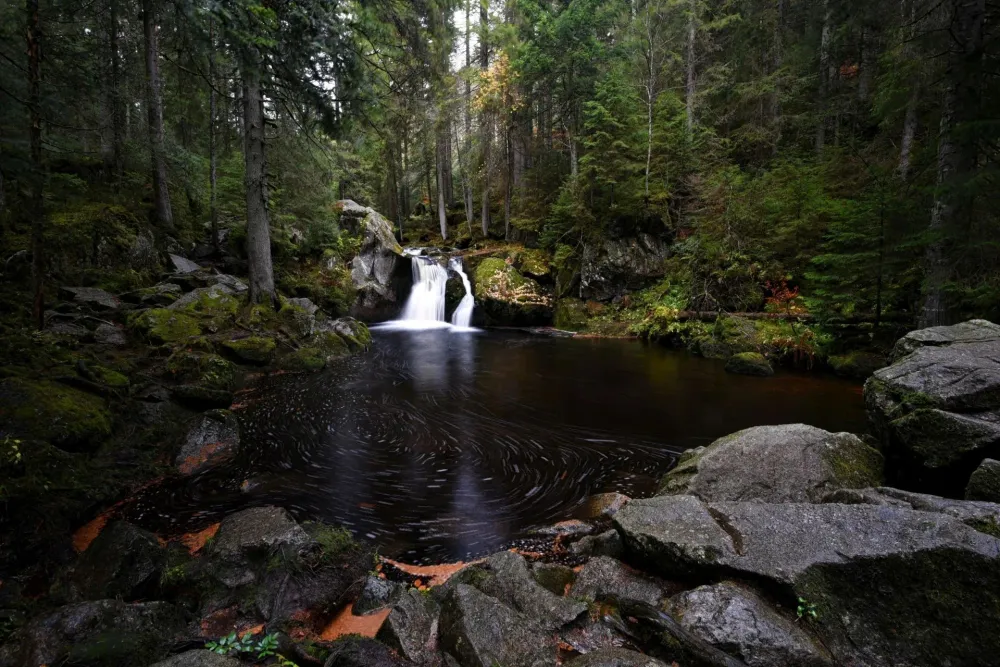
This post contains affiliate links. We may earn a commission if you make a purchase, at no extra cost to you. As an Amazon Associate, Dadnology earns from qualifying purchases.
1. The Problem With Handheld Water Shots
📷 This guide is part of our Nikon Brand Hub — every Nikon Z body and lens we’ve tested, from wildlife glass to landscape and family photography kits.
Point a camera at a waterfall on auto mode and you get one of two disappointing results. In bright light, the camera picks a fast shutter speed and freezes every droplet mid-air — technically sharp, but flat and lifeless, nothing like what your eyes actually experienced standing there. Try to slow it down handheld instead, and you get the opposite problem: your own hands introduce a smear across the whole frame, water and rocks alike, because nothing you’re holding is as still as it feels.
Long exposure photography is the deliberate fix for both. Instead of fighting to freeze motion, you lean into it — you let the shutter stay open long enough that moving water blurs into a smooth, painterly texture while everything solid in the frame (the rocks, the trees, the far bank) stays perfectly sharp. That contrast between silky-soft water and crisp everything-else is the entire visual trick behind nearly every dramatic waterfall or lake photo you’ve ever admired, and it’s controllable, repeatable, and not particularly hard once you understand the three things actually driving it.
AdLeofoto LS-324CX Carbon Tripod with LH-40 Ball Head (opens in a new tab)
The one non-negotiable item on this list. Every shot in this guide with a shutter speed over roughly 1/30s needed a completely still base — no exceptions.

This guide skips the theory-heavy version of this topic and works instead from eight real photographs — waterfalls, glass-flat lakes, and a misty coastline — each with its actual shutter speed, aperture, and ISO attached. Real settings from real conditions, not a textbook example shot in a studio.
2. What Exactly Is Long Exposure Photography?
At its simplest: a long exposure is any photograph where the shutter stays open long enough for movement to visibly blur while stationary elements stay sharp. “Long” is relative — it can mean a deliberate 1/15th of a second for a waterfall, or a full 20 seconds for a lake at dawn. What makes it “long exposure” isn’t a specific number, it’s that the shutter speed is slow enough to be a creative choice rather than an accident.
The Exposure Spectrum for Water
Water doesn’t have one “long exposure look” — it has a whole spectrum, and where you land on it is a direct function of shutter speed.
| Shutter Speed | Effect on Water | When to Use It |
|---|---|---|
| Faster than 1/500s | Frozen droplets, individually visible | Splashes, crashing waves, action |
| 1/60s - 1/15s | Slight motion blur, texture still visible | Streams, gentle rapids, a hint of movement |
| 1/2s - 2s | Silky, soft texture, most detail smoothed | Waterfalls — the classic 'silk' look |
| 5s - 15s | Fully smoothed, individual waves gone | Rivers, choppy lake surfaces, coastal water |
| 15s and longer | Glass-flat, mirror-like, moving clouds streak | Still lakes, dramatic sky, blue hour |
None of these is “correct” — they’re a menu. A mountain stream at 1/15s still reads as water in motion; the same stream at 15 seconds turns into an abstract wash. Deciding where to land on that spectrum is the actual creative decision behind every shot in this guide.
3. How It Works: Shutter Speed, ND Filters & the Light Problem
Think of your shutter as a door that lets light hit the sensor for a set amount of time. A fast shutter is a door that opens and slams shut before anything can move meaningfully. A slow shutter is a door propped open — long enough that anything moving during that window smears across the frame, while anything still stays put and sharp.
This is where a neutral density (ND) filter earns its keep. It’s a plain gray piece of glass — either a screw-in circle or a rectangular piece that drops into a holder mounted on the lens — that does one job: it cuts the amount of light reaching the sensor by a fixed, known amount, without changing color or contrast. Think of it as sunglasses for your lens. Without one, a bright midday scene physically cannot be exposed for several seconds without blowing out completely — no amount of aperture or ISO adjustment gets you there. With one, you reclaim the shutter speeds you need even in full sun.
A circular polarizer does a smaller version of the same job as a side effect of its main purpose. Its real role is cutting glare and reflections off wet rock, leaves, and the water’s surface — which, for water photography specifically, matters almost as much as the exposure length itself. A polarizer typically costs you about one stop of light, which is sometimes just enough to slow the shutter into silky-water territory without needing anything else at all.
There’s a third filter type worth knowing before you buy anything: the graduated ND filter. It’s dark on one half and clear on the other, with a soft transition between them, and it’s built to hold back a bright sky while leaving a dark foreground untouched — exactly the scenario a lake or coastal long exposure produces constantly. A graduated filter only works if you can slide it up or down to place that transition line precisely on the horizon, which a circular screw-in filter physically cannot do. That’s the entire reason 100mm holder kits exist: not because screw-in filters are inferior, but because graduated control needs a filter you can move. Our filter holder vs screw-in filters guide breaks down exactly when each system earns its place in the bag.
AdHaida Red Diamond M10 Master 7 Filter & Holder Kit (100mm) (opens in a new tab)
The filter kit behind every shot in this guide. Its three graduated NDs are the reason it's a holder system rather than screw-in glass — you slide them to place the transition line on the horizon, holding back a bright sky without darkening the dark foreground.

Aperture & ISO: The Supporting Cast
Shutter speed does the creative work, but aperture and ISO set the boundaries you’re working within. A smaller aperture (a higher f-number like f/11 or f/16) lets in less light and buys you a slower shutter speed for free, which is why most of the shots in this guide sit between f/11 and f/16 rather than wide open. ISO should almost always be at its lowest native value — 64 or 100 on most cameras — since a higher ISO does the opposite of what you want here: it lets you use a faster shutter speed, which is the last thing a long exposure shot needs.
4. Why a Tripod Isn’t Optional
Every technique in this guide falls apart without one piece of gear: a tripod that does not move, even slightly, for the full duration of the exposure. A shutter speed slow enough to smooth water is also slow enough to record every tiny movement in your hands, and unlike a fast shutter that “freezes” that movement into nothing, a long exposure records it as a visible, ruinous blur across the entire frame — not just the water.
Two practical habits matter as much as the tripod itself. First, use a two-second self-timer or a remote release instead of pressing the shutter button directly — the act of pressing it, even on a locked-down tripod, transmits a tiny vibration that a multi-second exposure will absolutely capture. Second, turn off in-lens or in-body image stabilization once the camera is on a tripod; on some systems, stabilization designed to counteract handheld shake can actually introduce a small amount of its own motion when there’s no shake to correct, which shows up as very slight softness in a long, locked-off exposure.
5. Gear: What You Actually Need
Minimum viable setup: any camera with a manual or aperture-priority mode, a lens, and a tripod. Overcast or low-light conditions alone will get you into the 1-5 second range without any filter at all — several of the shots in this guide were taken exactly this way.
Recommended setup: add a quick screw-in circular polarizer for glare control on the days you want to move fast. This alone covers a surprising amount of ground, from a misty dawn lake to a moderately bright morning.
Power-user setup: this is where a proper filter holder earns its keep — a 100mm system with a CPL and a set of plain and graduated ND filters covers every water condition, including the bright-sky-dark-foreground scenes long exposures produce constantly. Pair it with a full-frame body with strong dynamic range and a genuinely sturdy carbon tripod that won’t drift under wind at a coastal or mountain location.
AdHoya Circular UX II Pol Filter (82mm) (opens in a new tab)
The quick option when you don't need graduated control — screws straight on, cuts glare, and costs roughly a stop of light on its own, sometimes enough to slow the shutter without the holder kit at all.
The lens’s filter thread matters more than most beginners expect, but not for the reason people assume. A lens with a flat, recessed front element — like the Nikon Z 14-30mm f/4 S and its standard 82mm thread — gives you a genuine choice: screw on a quick polarizer directly, or mount a 100mm holder kit via a thread adapter when you need graduated control. A lens with a bulging front element takes that choice away entirely — no screw-in filter fits at all, holder system only. And because a long exposure often means a bright sky next to a dark, shadowed foreground in the same frame, a sensor with real dynamic range — the Nikon Z8 is the body behind several of the shots below — makes the difference between a foreground you can recover in post and one that’s simply lost to noise.
6. Real Shots, Real Settings: The Exposure Spectrum in the Field
Here’s the spectrum from section 2, but with the actual settings behind real photographs instead of theoretical ranges.
| Location | Shutter Speed | Aperture | ISO | Effect |
|---|---|---|---|---|
| Misurina See, Dolomites | 20s | f/16 | 200 | Fully glass-flat lake, streaked clouds |
| Hallstatt, Austria | 15s | f/13 | 100 | Mirror-still dusk reflection of village lights |
| Obersee, Berchtesgaden | 5s | f/11 | 100 | Smoothed lake surface, soft cloud motion |
| Krai-Woog-Gumpen, Black Forest | 5s | f/13 | 100 | Waterfall fully smoothed to a soft veil |
| Gertelbach Falls, Black Forest | 1.6s | f/13 | 100 | Silky waterfall texture, some flow visible |
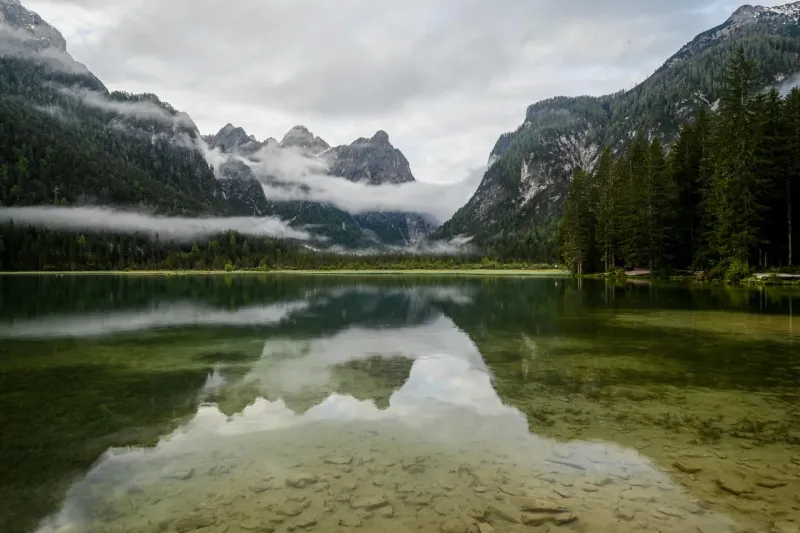
| Toblacher See, Dolomites | 1/8s | f/16 | 100 | Gentle ripple smoothing, narrow aperture |
| Forest stream, Black Forest | 0.77s | f/11 | 100 | Mid-length blur, shot mid-morning under canopy |
| Baltic coast near Darss | 1/15s | f/11 | 100 | Subtle wave motion, dusk light |
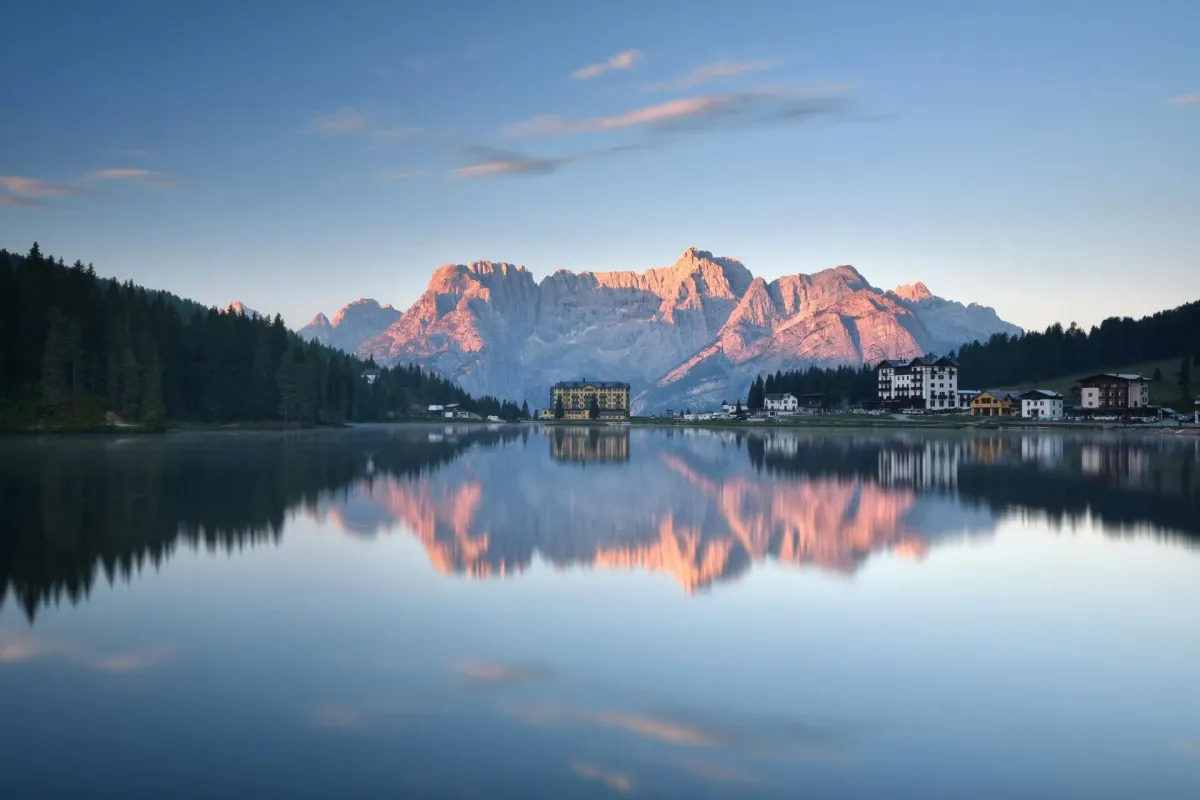
The Misurina shot is the extreme end of the spectrum — twenty full seconds turns a lake that had gentle wind ripples into a perfect mirror, and the thin clouds overhead streak into soft horizontal lines. That length of exposure at f/16 and a low ISO was only possible because it was shot at 6:22am; the same settings at noon would be several stops overexposed without an ND filter.
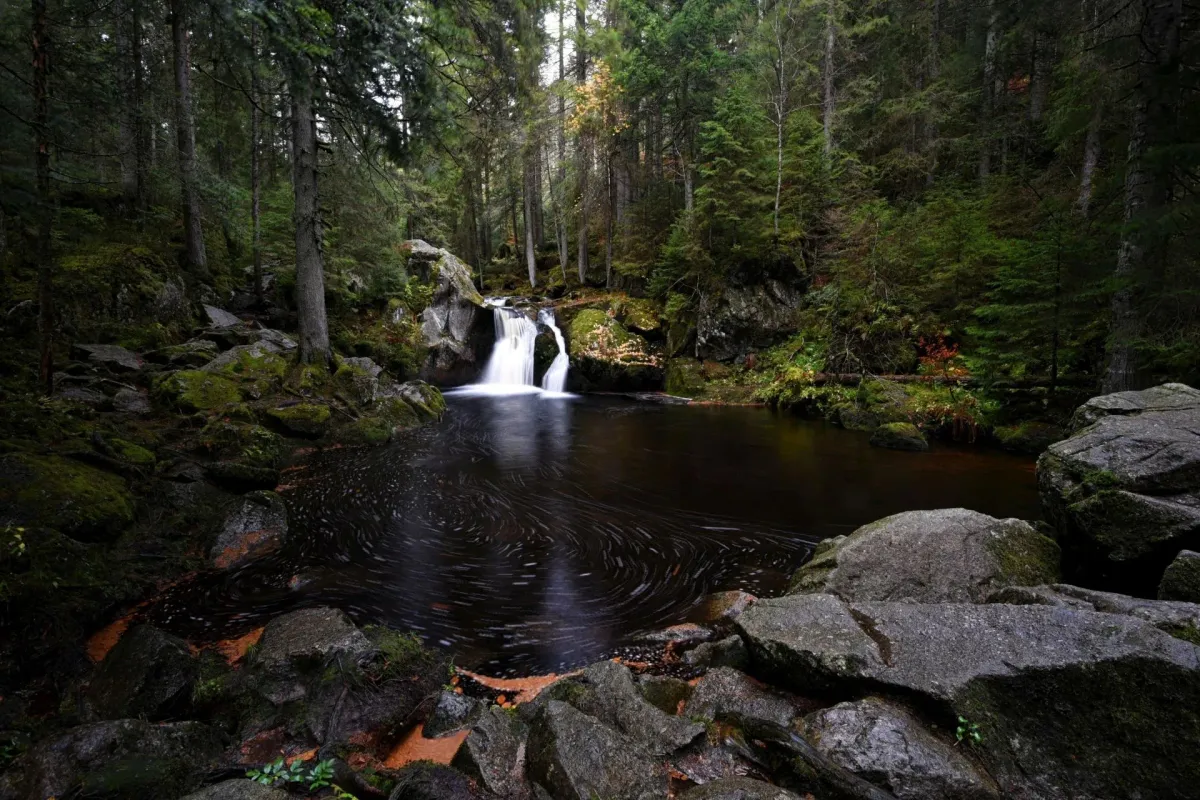
Compare that to the Krai-Woog-Gumpen waterfall at five seconds: still fully smoothed, but shot under thick forest canopy that did the job an ND filter would otherwise have to do. This is worth remembering — the “you need an ND filter for long exposure” advice assumes open daylight. Deep forest, overcast skies, and the hour around sunrise or sunset often give you enough of a head start that a filter becomes optional rather than mandatory.
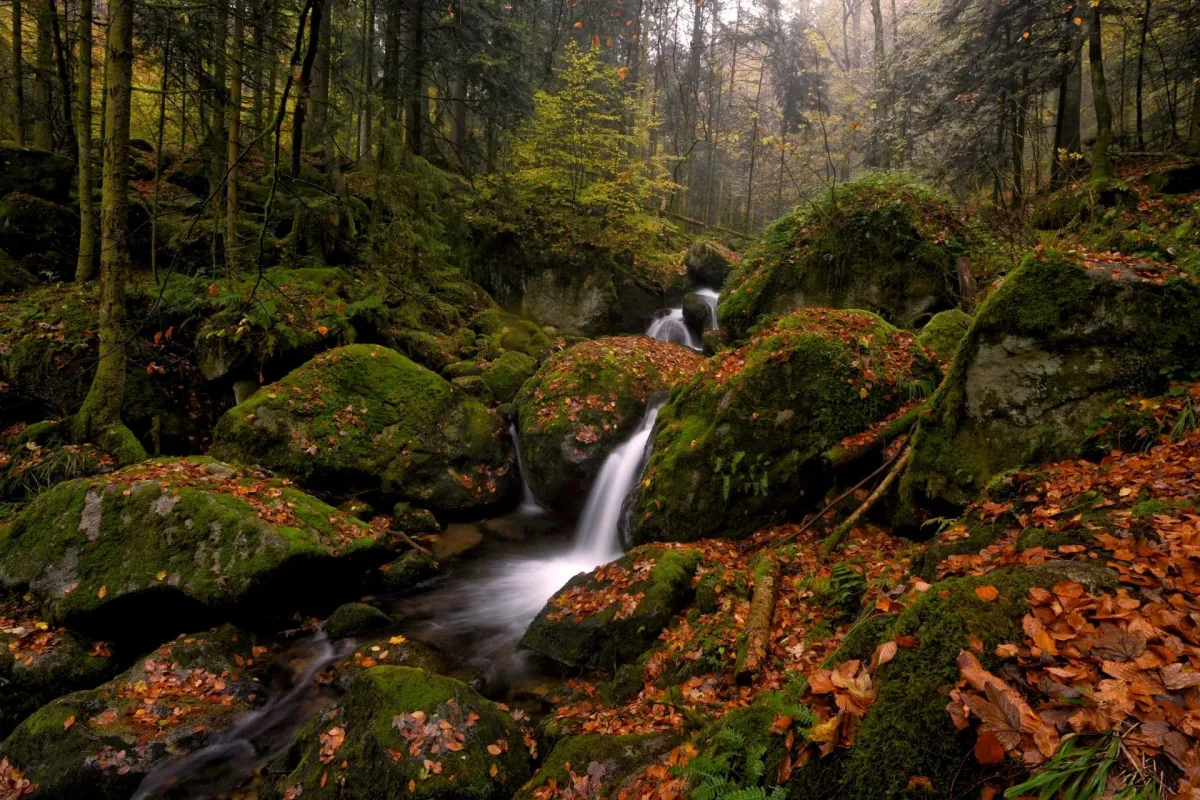
Set the Gertelbach shot next to the Krai-Woog-Gumpen one and the difference a few seconds makes becomes obvious — 1.6 seconds retains real texture and a sense of the water’s structure, where 5 seconds fully dissolves it. Neither is more “correct”; it’s a matter of which look tells the story of that specific waterfall better.
7. Getting Started: Your First Long Exposure
- Pick a subject and a time. A stream, waterfall, or lake, ideally in the first or last hour of daylight, or under overcast skies — this gives you the most room to experiment before you need a filter.
- Mount the camera on a tripod and switch off image stabilization. This is not optional past about 1/30s.
- Set aperture priority, f/11, ISO at its base value, and take a test shot. Check the shutter speed the camera chose.
- Read the result. If the shutter speed shown is already 1-4 seconds, you’re in business — take the shot and adjust from there. If it’s faster than about 1/15s, the scene is too bright for the effect you want without a filter.
- Add a polarizer first if you have one — it cuts glare and buys you roughly a stop. If you still need more, add an ND filter on top and re-meter.
- Use the two-second timer or a remote release, never the shutter button directly, and check your histogram rather than trusting the screen in bright light.
Pros
- Transforms an ordinary stream or lake into a genuinely dramatic image with no special editing required
- Works with almost any camera and lens — the technique matters far more than the gear tier
- A tripod and polarizer alone unlock most of the effect; an ND filter is only needed in bright daylight
- Endlessly adjustable — the same scene can look completely different at 1 second versus 15 seconds
Cons
- Genuinely requires a tripod — there is no handheld shortcut past about a quarter of a second
- Bright midday light needs an ND filter, which is one more piece of gear and one more thing to dial in
- Moving subjects other than water (people, cars, animals) will also blur, which is not always wanted
- Trial and error on-site is normal — expect to check the histogram and re-shoot more than once per scene
Conclusion: A Technique, Not a Gear Purchase
Long exposure water photography is one of the few genuinely dramatic upgrades in landscape photography that costs almost nothing to learn — a tripod and an understanding of the shutter-speed spectrum get you most of the way there, and a polarizer or ND filter only becomes necessary once you’re shooting in bright daylight. Every shot in this guide, from a 20-second glass-flat lake to a 1/15s hint of motion on the Baltic coast, comes down to the same three levers: shutter speed, aperture, and whatever’s needed to make the exposure long enough without blowing out.
Start with an overcast morning and a stream, skip the ND filter until you actually need one, and pay more attention to your histogram than the LCD preview. The rest is repetition.
The Final Word: Long exposure water photography earns a genuine 5/5 for what it’s built to do — it turns an ordinary lake or waterfall into the kind of shot people stop scrolling for, and it’s one of the few techniques in photography where the gear list is short and the settings are fully explainable.
Related Dadnology reviews: Nikon Z 14-30mm f/4 S Review · Nikon Z8 Review · Best Photography Spots in the Alps & Germany
What is a good shutter speed for long exposure water photography?
Do I need an ND filter for long exposure photography?
What is the difference between an ND filter and a polarizer for water photography?
Can you do long exposure photography without a tripod?
Why does my long exposure photo look overexposed or blown out?
What camera settings should a beginner use for their first waterfall photo?
Keep this in your inbox
One email a week: what we actually watched, built and reviewed — the stuff worth a dad's time. No hype, no daily spam.
Dadnology Weekly
One email a week: the LEGO, gaming and movie news worth a dad's time — plus what we actually reviewed. No hype, no daily spam.
Disclaimer: This review and its visuals were created with the help of AI. Some links may be affiliate links – we may earn a commission if you make a purchase, at no extra cost to you.
You might also like
Filter Holder System vs Screw-In Filters: Why I Carry Both
Why a landscape photographer carries a 100mm holder kit AND a screw-in polarizer — what each is actually for, and when each one wins.
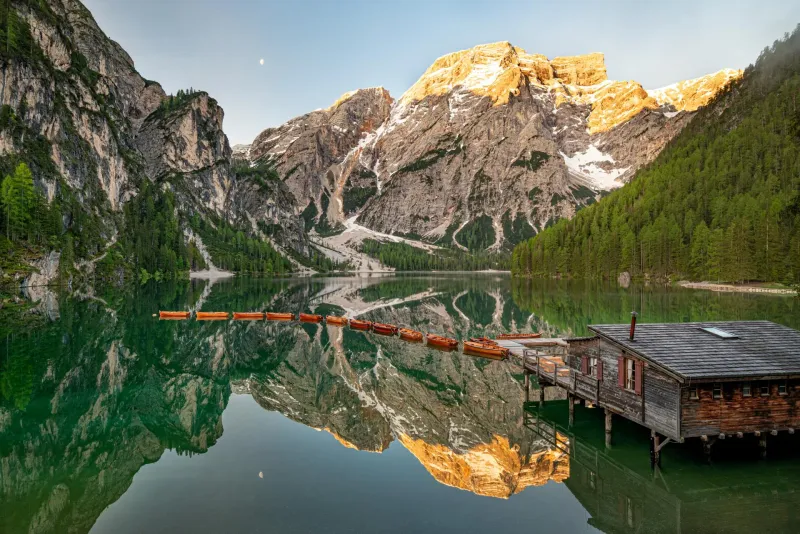
Best Photography Spots in the Alps & Germany: A US Traveler's Guide
The real photography spots worth the jet lag — Alps, Dolomites, Black Forest and the Baltic coast, shot on Nikon and grouped for a US road trip.
Nikon's New Full-Frame Camera Ditches the Viewfinder Entirely
A genuinely interesting entry-level full-frame body with a real trade-off at its center. The specs are nearly identical to the Z5 II for $300 less — you're just composing every shot on the back screen, phone-style.