
PMI SmokeNINJA Fog Machine Review: The Toy Photography Secret Weapon
Weeks behind a LEGO diorama with the PMI SmokeNINJA: the dry ice mode that pools fog on the stage, the haze mode that paints the background, and an honest verdict.
This post contains affiliate links. We may earn a commission if you make a purchase, at no extra cost to you. As an Amazon Associate, Dadnology earns from qualifying purchases.
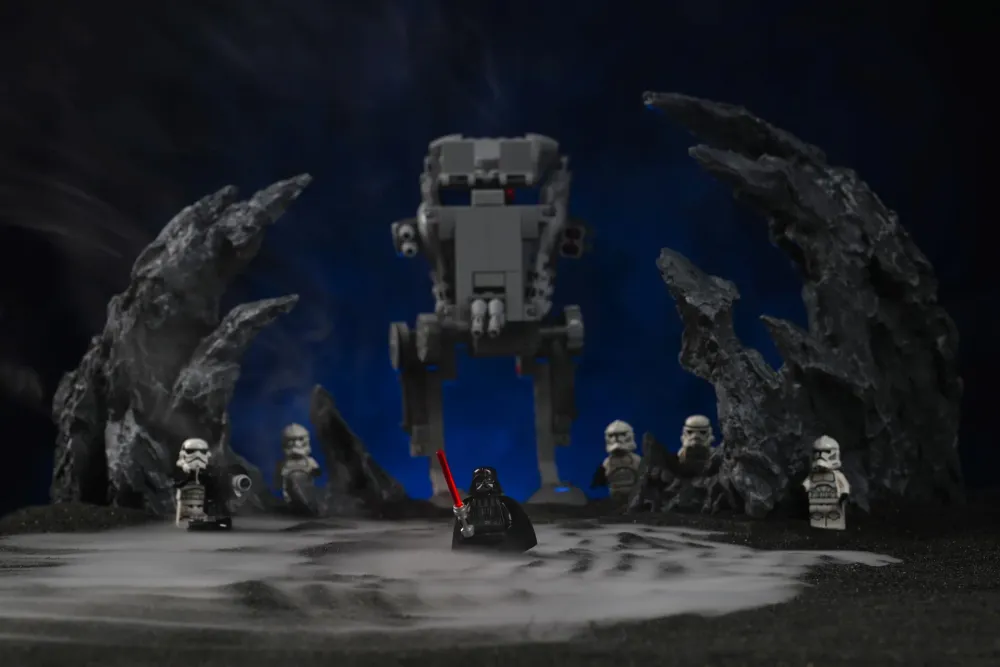
The PMI SmokeNINJA is the smallest, cheapest upgrade we have ever made to our toy photography setup — and it is also the one upgrade every single person asks about. Drop a fog machine the size of a TV remote inside a LEGO diorama, hide it behind a rock, and pull the trigger: a plastic spaceship suddenly looks like it is parked on an alien moon. After several weeks of hiding this thing inside builds ranging from a Dune Atreides Royal Ornithopter to an AT-ST walker to a full Vader-and-troopers scene, the honest verdict is this: it is a 5/5, it is the single biggest “wait, how did you do that?” tool in our entire kit, and we have not even tested it outdoors yet.
Nothing in that spec sheet screams “professional cinema tool,” and that is precisely the point. This is a hobbyist-priced device that happens to produce a professional-looking effect, and for a dad shooting LEGO sets on a kitchen table after bedtime, that trade is the whole story.
What the SmokeNINJA Actually Is
Strip away the marketing and the SmokeNINJA is a handheld atomizer: a small heating chamber, a water-based fluid tank, a fan, and three interchangeable nozzles that decide what the output looks like when it leaves the unit. PMI sells a bigger, pricier machine called the SmokeGENIE for full-room event fog — the SmokeNINJA is the pocket-sized sibling built for photographers and videographers who need atmosphere in a much smaller frame, and it shows: at 14cm tall and 286g, it disappears completely behind a rock formation or inside the shell of a larger LEGO build.
There is no digital display. Instead, a vertical LED strip on the body changes color per mode and visibly drains as you hold the trigger, then refills during the cooldown — a genuinely clever bit of feedback design that tells you exactly how much burst you have left without ever looking away from the camera. The rubber seal on the fluid vial even changes color to signal when the chamber has cooled down enough to touch safely, which matters more than it sounds like it should when you are elbow-deep inside a diorama trying to reposition a minifigure mid-shoot.
AdThe One We Use Every Shoot (opens in a new tab)
The handheld fog machine hiding inside almost every diorama on this site — small enough to disappear behind a rock, triggered by remote without ever touching the set.

The Full Kit — the version linked throughout this review — includes the device itself, a wireless remote, the fluid chamber, a 100ml bottle of Cloud Formula fluid, a set of precision smoke-shaping nozzles, the dedicated dry ice nozzle, a USB-C charging cable, both mount adapters, and a soft protective case. Nothing about setup requires more than charging it once and screwing the fluid vial into place.
Dry Ice Mode: The Effect That Sells the Whole Hobby
If you only read one section of this review, make it this one, because the dry ice mode is the reason we bought the SmokeNINJA in the first place and the reason we keep reaching for it over every other atmosphere tool we own.
Here is the thing worth being honest about upfront: the SmokeNINJA does not use actual dry ice. There is no frozen CO2 anywhere in this device. What it actually does is run the same Cloud Formula fluid through a dedicated tube-and-sponge nozzle that lays the output down low instead of releasing it upward into the air — the result is fog that pools and spreads across a surface exactly the way real dry ice fog does in a theatrical fog pit, minus the actual dry ice, the gloves, and the trip to a specialty supplier.
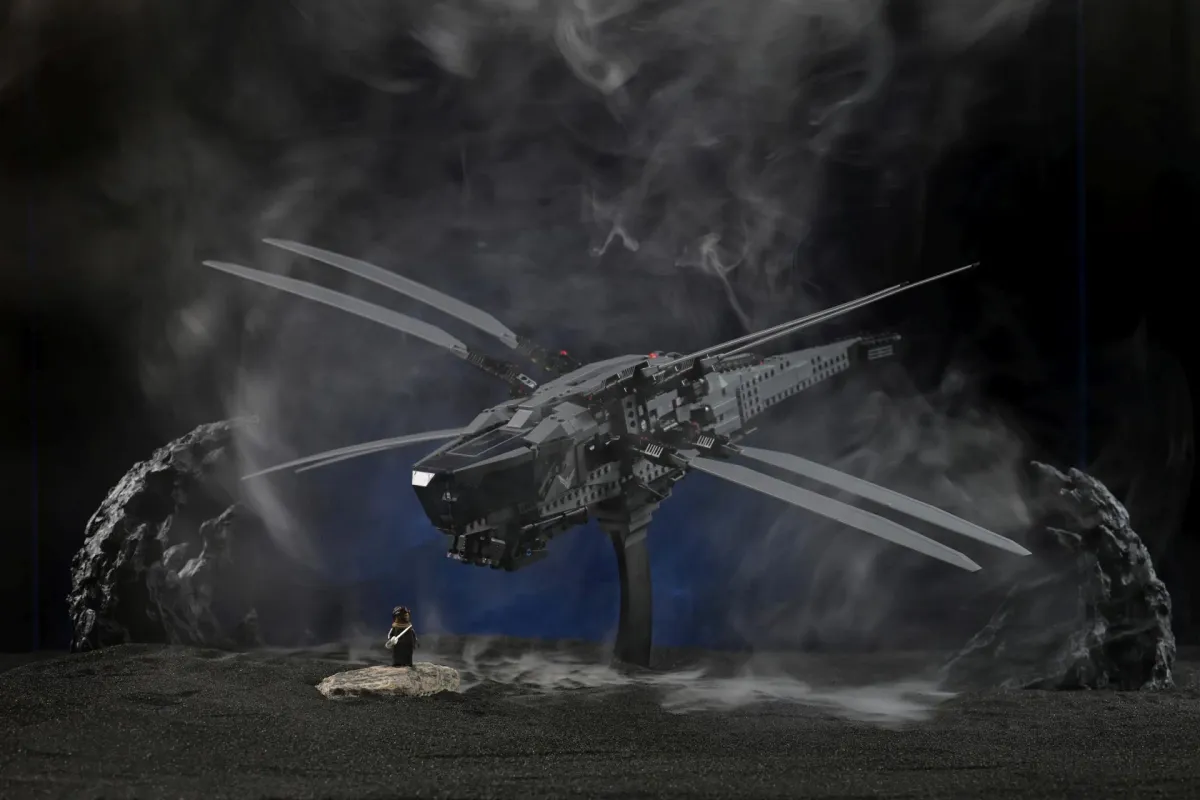
For LEGO scale specifically, this is close to unfair. A minifigure standing ankle-deep in slowly pooling fog reads as genuinely atmospheric in a way that no amount of post-processing smoke brushes ever quite manages, because real fog interacts with real light and real terrain — it catches on the aquarium rocks from our studio setup, it thins unevenly, it drifts if you so much as breathe near the set. Nudging a minifigure’s cape after a dry ice burst visibly disturbs the pooled fog and sends a fresh plume curling upward, which is its own trick worth knowing: shoot the disturbance, not just the calm pool.
The honest downside, and the only real mark against this mode: it leaves a thin, faintly tacky film wherever it lands. It washes off bricks and minifigure faces with a quick wipe, but it is not a “shoot and immediately pack away” effect — budget thirty seconds of cleanup after any dry ice session, especially if the set is going back in a display case afterward.
Haze Mode: Painting the Background With Light
The second mode we reach for constantly does a completely different job: general haze, released upward and outward rather than pooled on the ground. On its own this mode is unremarkable — it is the same fluid, dispersed more like a conventional fog machine. Combined with a light source behind the set, though, it becomes the tool that makes our backgrounds look like a film frame instead of an empty room.
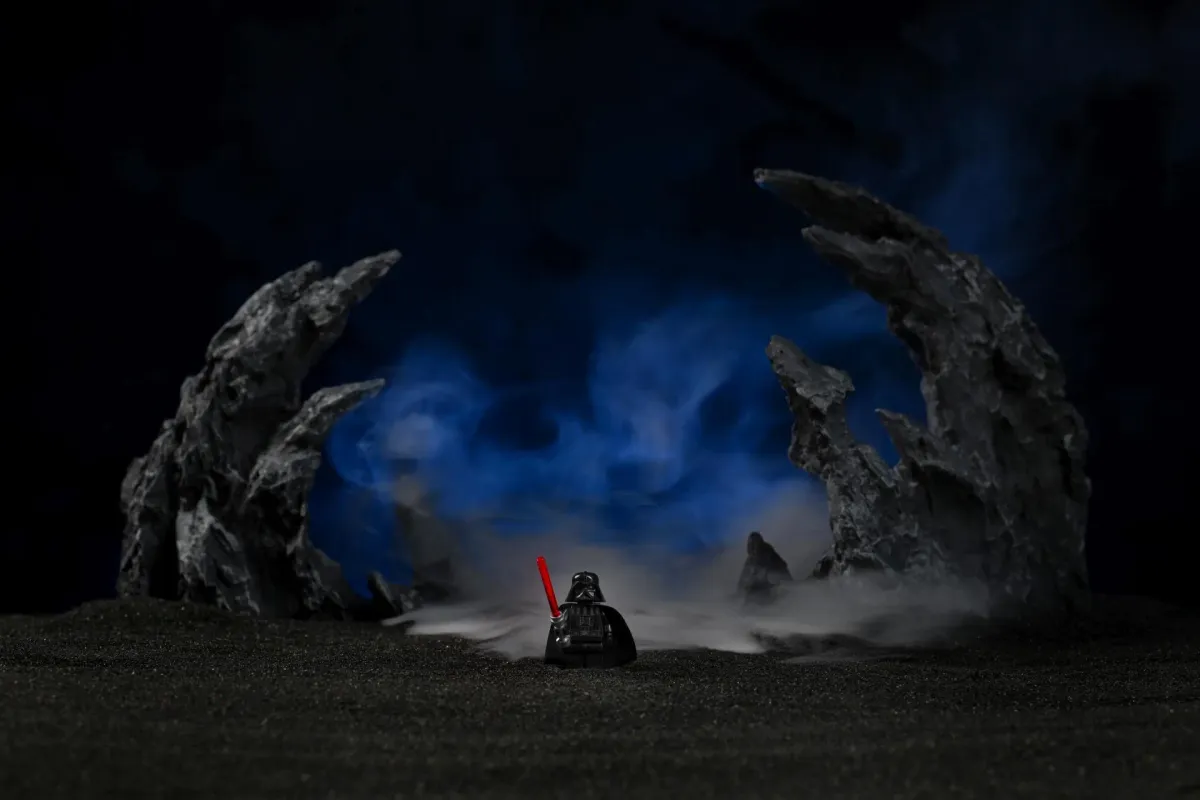
We run the SmokeNINJA’s haze behind a blue-gelled RGB tube light for a cold, moody base tone (the same rig from our full toy photography setup), and the haze is what makes that light visible at all instead of just illuminating a flat wall. Fog only exists on camera when there is light behind it — release haze into a dark room with no backlight and you have accomplished nothing but wasted fluid. Get the light placement right, though, and a single burst turns a bare backdrop two metres behind the set into something that looks like it belongs in a movie still.
AdFor Bigger Rooms, Not Bigger Tables (opens in a new tab)
The Bluetooth-paired haze nozzle and 1,000 sq ft coverage solve a room-scale problem — a LEGO diorama never needs it.

Do You Need the PRO Hazer Kit Instead?
Short answer: not for this hobby. PMI also sells a SmokeNINJA PRO HAZER KIT, and it is tempting to assume the pricier, Bluetooth-enabled version is simply the better buy. For toy and LEGO photography specifically, it is not — the Pro’s upgrades solve a completely different scale of problem.
| Feature | SmokeNINJA (Full Kit) | SmokeNINJA PRO Hazer Kit |
|---|---|---|
| Effect modes | Fog, Dry Ice, Steam | Haze (dedicated nozzle) |
| Coverage per burst | Up to ~500 sq ft | Up to ~1,000 sq ft |
| Burst time | Up to 60 seconds | 3 minutes continuous, 3x faster recovery |
| Control | Wireless remote | Bluetooth nozzle pairing + USB-C, optional DMX |
| Built for | Tabletop dioramas, handheld shoots | Studios, events, stage/lighting-desk setups |
| Verdict for LEGO/toy photography | Yes — this is the one to buy | Overkill; skip unless you also shoot events |
The Pro’s headline feature is a 3rd-generation haze nozzle that pairs to the device over Bluetooth and pushes a wide, diffused haze vortex far enough to fill a 1,000-square-foot room — genuinely useful for a wedding photographer or a videographer lighting an entire studio. It also swaps the 60-second burst cap for three minutes of continuous output with a much faster recovery, which matters when you need atmosphere running continuously during a live shoot or event rather than in short bursts between still frames.
None of that moves the needle for a diorama that measures roughly a metre across. Our stage does not need 1,000 square feet of haze — it needs a thin drift confined to an area a fraction of that size, and the standard SmokeNINJA’s coverage floods it several times over from a single burst. We also do not need Bluetooth pairing or DMX control; the handheld remote that ships in the Full Kit already lets us trigger a burst mid-composition without touching the set, which is the only “wireless” feature this hobby actually requires. Unless you are planning to branch into event or studio video work where the haze needs to blanket an entire room continuously, the money saved by skipping the Pro kit is better spent on LEGO.
Real-World Performance: Three Weeks Behind the Same Diorama
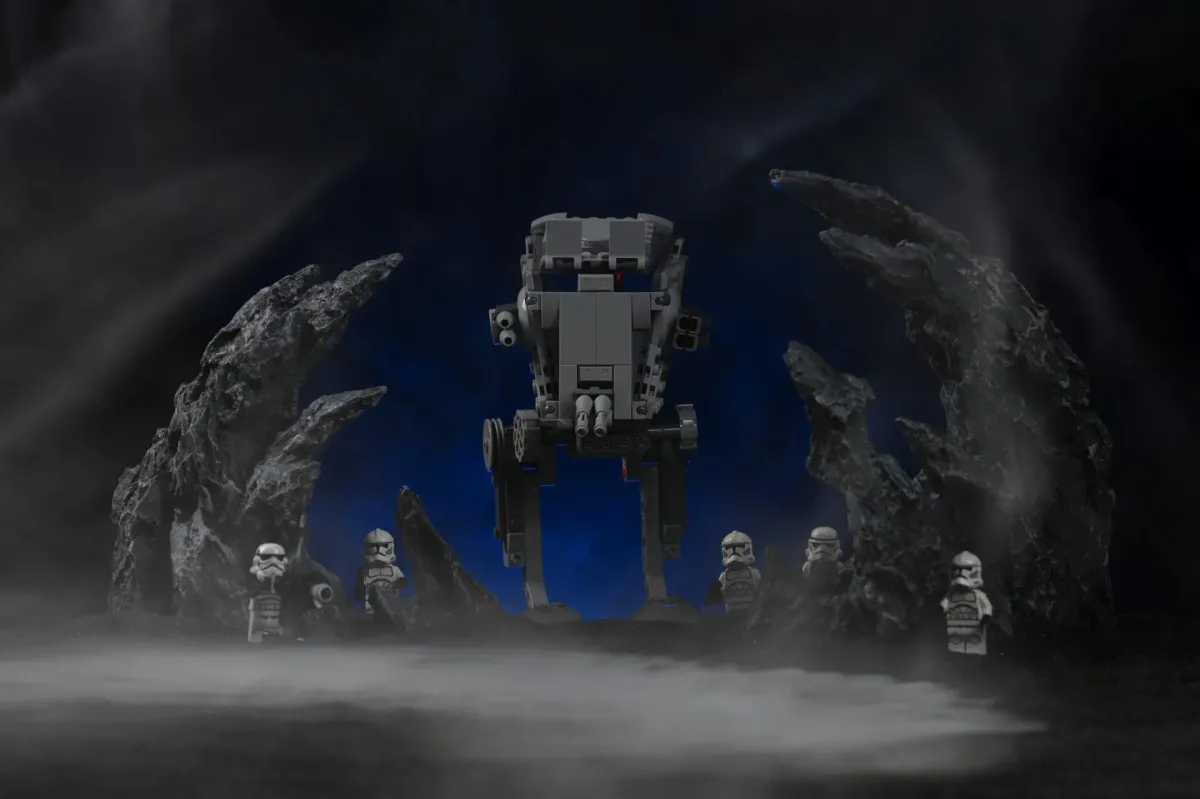
The single biggest practical win is the remote trigger. Every other atmosphere trick we have tried — waving a hand fan near dry ice cubes, misting water into a beam of light — requires physically reaching into frame, which means re-checking focus and composition after every attempt. The SmokeNINJA’s included remote fires a burst from across the room, so the diorama itself never moves between the “before” and “during” shots. For a stage that has already been lit, focused, and framed exactly how you want it, that is worth more than any single spec on the page.
Battery life across a typical evening shoot has been a non-issue — a full charge over USB-C comfortably outlasts a two-hour session covering multiple setups. The one real friction point is the 60-second burst cap: on a session where we are chasing a very specific pooling pattern and burning through several attempts back-to-back, the cooldown between bursts is the moment you actually notice you are using a budget-tier device rather than a professional fog rig. It is a minor tax, not a dealbreaker — start the next composition change during the cooldown and it barely registers.
Indoors So Far, Outdoors Next
Every photo in this review, and every LEGO shot on this site that uses the SmokeNINJA, was taken indoors on our studio stage, where the air is still and the fog behaves exactly as advertised. We have deliberately not made any outdoor claims here, because we have not tested it outdoors yet — a stray breeze that would do nothing to a studio’s still air could scatter a fine haze in seconds outside. Outdoor toy photography is next on our list precisely because of how well the indoor results have gone, and we will update this review with real outdoor results once we have them rather than guessing.
Pros
- Dry ice mode pools thick, genuinely cinematic fog directly on a tabletop diorama — the single biggest upgrade in our whole toy photography kit
- Small enough (14cm, 286g) to hide inside or behind a build and fire by wireless remote without ever touching the set mid-composition
- Three distinct modes — Fog, Dry Ice, Steam — cover godrays, ground-hugging pooling fog, and delicate wisps from one device
- USB-C charging and a 100ml bottle rated for roughly 200 minutes of output — no propane, no messy oil-based fog fluid refills
Cons
- Dry ice mode leaves a thin, faintly tacky residue that needs a quick wipe-down off bricks and minifigures afterward
- 60-second burst cap before a cooldown paces how quickly you can chase repeat attempts at the same shot
- Outdoor performance is genuinely untested as of this review — indoor results only, an update is coming
Conclusion: The Cheapest Upgrade That Looks the Most Expensive
After several weeks of hiding the PMI SmokeNINJA inside every diorama we have built, the verdict is an easy buy. Nothing else in our toy photography kit — not the lights, not the aquarium rocks, not the geared head — produces as dramatic a jump in “how did you do that?” comments per euro spent as this small handheld fog machine does, and the dry ice mode specifically is doing most of that work.
If you already own a camera and a LEGO shelf and you have read our toy photography studio setup, this is the next purchase, full stop. Skip the PRO Hazer Kit unless you are also shooting events or studio video at room scale — the standard Full Kit is built for exactly this job.
The Final Word: The dry ice mode alone justifies the price; everything else it does is a bonus. Indoor testing only so far — the outdoor verdict is still to come.
Does the PMI SmokeNINJA actually use dry ice?
Is the PMI SmokeNINJA safe to use around LEGO sets and minifigures?
Do I need the SmokeNINJA PRO Hazer Kit for LEGO and toy photography?
How long does one PMI SmokeNINJA session actually last?
Does the PMI SmokeNINJA work outdoors?
Keep this in your inbox
One email a week: what we actually watched, built and reviewed — the stuff worth a dad's time. No hype, no daily spam.
Dadnology Weekly
One email a week: the LEGO, gaming and movie news worth a dad's time — plus what we actually reviewed. No hype, no daily spam.
Disclaimer: This review and its visuals were created with the help of AI. Some links may be affiliate links – we may earn a commission if you make a purchase, at no extra cost to you.
You might also like

Filter Holder System vs Screw-In Filters: Why I Carry Both
Why a landscape photographer carries a 100mm holder kit AND a screw-in polarizer — what each is actually for, and when each one wins.
How to Shoot Long Exposure Water Photography (Real Settings)
The real camera settings behind 8 long-exposure water shots — from a 20-second glass-flat lake to a 1/15s waterfall, explained step by step.
Best Photography Spots in the Alps & Germany: A US Traveler's Guide
The real photography spots worth the jet lag — Alps, Dolomites, Black Forest and the Baltic coast, shot on Nikon and grouped for a US road trip.