
The opinionated home: Automating your life with OpenClaw and Home Assistant
Stop being your home's remote control. Learn how to integrate OpenClaw with Home Assistant to build an AI agent that manages your house based on intent, not just schedules.
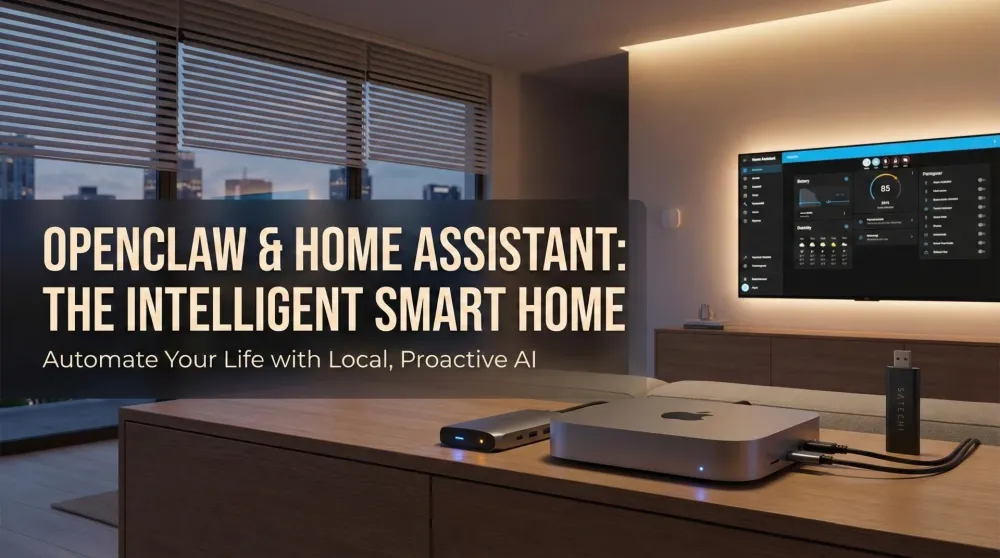
This post contains affiliate links. We may earn a commission if you make a purchase, at no extra cost to you. As an Amazon Associate, Dadnology earns from qualifying purchases.
🛑 SAFETY & SECURITY WARNING
AI agents are powerful but imperfect.
- No Critical Control: Never allow an AI agent to control high-risk entry points (Smart Locks, Garage Doors) or appliances (Stoves, Heaters) without a manual confirmation step.
- Physical Safety: Ensure all automated hardware is Matter or UL-certified.
- Isolation: Keep your smart home hub in a dedicated DMZ network to prevent the agent from accessing your personal financial data or photos.
Automate responsibly.
1. Introduction: From “if-this” to “I-want”
🦞 This guide is part of our OpenClaw Master Hub – every guide to running your own AI agent at home, from first install to family automations.
For years, the smart home dream was built on “Rules.” If the motion sensor trips, then turn on the light. This is tedious to set up and breaks the moment your life doesn’t follow a perfect script. After three years of home automation, most dads have accumulated a graveyard of rules that made sense at the time and now fire at wrong moments: the “arriving home” scene that triggers at 6 PM regardless of whether you actually came home, the “movie mode” that dims the lights when someone sits on the sofa for dinner by mistake, the “morning routine” that plays at 7 AM on a Saturday when you desperately wanted to sleep until 9.
The problem isn’t the hardware — it’s that rule-based systems have no context. They see a trigger and fire an action. They don’t know it’s Saturday. They don’t know you’re home sick. They don’t know your kids are still sleeping.
OpenClaw changes the paradigm. By integrating with Home Assistant, your home gains a Reasoning Engine that takes context into account before acting. Instead of writing 50 rules, you give your agent a personality and a goal.
- The Old Way: You spend two hours in a YAML editor setting up “Movie Mode.”
- The OpenClaw Way: You say, “Claw, we’re watching a movie,” and the agent identifies the time of day, checks who else is home via the presence sensor, closes the smart blinds if it’s still light outside, dims the Hue lights to 10%, sets your phone to ‘Do Not Disturb,’ and skips the step if someone is already sleeping in another room.
2. The hardware stack: Building the hub
To bridge the gap between AI and the physical world, your Mac mini needs a way to speak “IoT.” In 2026, that means Matter over Thread and Zigbee.
The essential bridge: SkyConnect
Your Mac doesn’t have a Zigbee radio. The Home Assistant SkyConnect is the gold standard USB dongle for this. It plugs directly into your Satechi Hub and allows your OpenClaw agent to discover and control thousands of devices locally.
Presence: Giving the agent “context”
Standard motion sensors are too dumb for an AI agent. We recommend the Aqara FP2. It uses mmWave radar to see where people are standing, sitting, or even lying down. This provides the “Context” your agent needs to decide if it should turn off the TV or just dim the lights because you’ve fallen asleep on the couch.
2.5 Step-by-step: First-time hardware setup
The hardware stack for this guide takes about two hours to set up from unboxing. Here’s the exact sequence we followed:
Step 1 — Mac mini preparation (30 min): Set up macOS fresh, create a dedicated user account (homeagent) with limited permissions. This account is what OpenClaw runs under — it doesn’t need admin access, and shouldn’t have it. Enable SSH under System Settings → General → Sharing. Install the HDMI Dummy Plug before first boot to prevent the Mac from complaining about no display.
Step 2 — SkyConnect setup (15 min): Plug the SkyConnect into the Satechi Hub’s front USB-A port. Install the Home Assistant OS on the Mac mini in a UTM virtual machine (free, runs natively on Apple Silicon) or as a Docker container via OrbStack. Point the VM’s USB passthrough at the SkyConnect dongle so Home Assistant sees it directly.
Step 3 — Aqara FP2 placement (20 min): Mount the sensor at a 45-degree angle in the corner of the primary room you want presence detection for. Connect it to Home Assistant via the Aqara app, then import it via the HomeKit integration. Spend time in the room moving around different zones — the sensor’s zone mapping is configurable and getting it right is what makes the difference between “it knows I’m here” and “it thinks the couch is a person.”
Step 4 — OpenClaw to Home Assistant bridge (45 min): In Home Assistant, generate a Long-Lived Access Token (your HA profile → Long-Lived Access Tokens). In OpenClaw, install the ha-mcp skill and paste the token. The skill discovers all your HA entities automatically. Test with a simple command: “Claw, list all lights currently on.” If it returns your actual lights, the bridge is working.
Step 5 — First workflow test (15 min): Start simple. “Claw, turn off all lights in the living room.” If that works without error, you’re ready to build the more complex context-aware workflows.
3. How to connect OpenClaw to your home
The integration relies on a protocol called MCP (Model Context Protocol). Here is the high-level workflow:
- Home Assistant (The Body): You run HAOS (Home Assistant Operating System) or a Docker container on your Mac.
- OpenClaw (The Brain): You install the
ha-mcpskill in your OpenClaw dashboard. - The Link: You provide OpenClaw with a Long-Lived Access Token from Home Assistant.
Once linked, your agent “sees” every entity in your house. If you’ve followed our Troubleshooting Guide, your latency should be low enough that voice commands feel near-instant.
4. The “opinionated” agent: Three 2026 use cases
This is where it gets fun. Here is what a dedicated M4 Mac mini can do when it’s in charge of your house.
Workflow #1: Proactive energy management
“Claw, the grid price is spiking. Optimize the house.” The agent checks your solar battery levels, delays the dishwasher, and raises the AC by 2 degrees—all without you lifting a finger. This is a massive part of our Passive Income/Savings Strategy.
Workflow #2: The secure “away” mode
When you leave, OpenClaw doesn’t just lock the doors. It enters “Occupancy Simulation.” It uses your historical lighting patterns to turn lights on and off realistically, making the house look lived-in while you’re away.
Workflow #3: The financial dashboard integration
Combine this with our Finance Guide. “Claw, how much did the HVAC cost me this month?” The agent pulls real-time energy data from your smart plugs and compares it to your monthly budget CSV.
| Feature | Starter (Consumer) | Advanced (Dadnology Stack) |
|---|---|---|
| Hub | Amazon Echo / Google Home | Mac mini M4 + Home Assistant |
| Privacy | Cloud-Processed (Logs stored) | 100% Local (Sovereign) |
| Logic | Simple Routines | Proactive AI Agents (OpenClaw) |
| Connectivity | Wi-Fi Only | Zigbee, Thread (Matter), Matter over Wi-Fi |
| Reliability | Fails if Internet is down | Works 100% Offline |
5. Workflow #4: The “dad focus” mode
Context-aware automation’s killer use case: your home recognizing that you’re working.
- The Trigger: The Aqara FP2 detects you sitting at your desk. OpenClaw cross-references your calendar and confirms a two-hour focus block.
- What Fires: Lights shift to a cooler 4000K, the office door’s smart lock sends a “do not disturb” status to your family’s shared Home Assistant dashboard, your phone enters focus mode via the Shortcuts integration, and the kitchen robot-vacuum skips its scheduled run.
- What Doesn’t Fire: The agent doesn’t touch anything it wasn’t asked about. Your kids’ room lights stay unchanged. The TV stays on if someone else is watching.
- Why this beats a schedule: A rigid “quiet hours from 9-11” timer doesn’t know you’re in a meeting at 8:30, or that you took the day off, or that your kids are also home. Presence + calendar context produces automations that actually reflect real life.
Workflow #5: The “returning home” sequence
- The Trigger: Your phone’s GPS enters your home geofence (via the Companion App), or the front door’s contact sensor trips.
- What Fires: Agent checks the time of day, weather, and whether anyone else is home. If it’s evening and you’re the first adult back: lights warm up to 2700K throughout the ground floor, thermostat adjusts to your preferred evening temperature, and the kitchen speaker starts your “cooking playlist.”
- The Non-Obvious Bit: If the presence sensor already shows someone in the living room, the agent skips the “arriving home” scene and just unlocks the relevant doors — no jarring scene override mid-episode.
6. Common mistakes to avoid
After running this setup for several months, these are the failure modes we’ve actually hit:
- Over-broad permissions. Your agent does not need write access to your entire smart home. Grant access entity by entity — lights yes, locks only via a confirmation step, never the garage door automatically.
- Skipping the DMZ. Running Home Assistant and OpenClaw on the same network segment as your NAS and family photos means a single prompt-injection bug could reach everything. Isolate the hub.
- Presence sensor placement. The Aqara FP2 needs clear line-of-sight and correct zone mapping. A poorly placed sensor produces ghost-occupancy detections that trigger automations when nobody’s home. Take 20 minutes to map zones properly before setting up workflows.
- Automation conflicts. If you have both an OpenClaw agent and legacy Automations in Home Assistant running on the same entity, they fight. Migrate your best “if-this-then-that” rules to agent instructions and disable the old automations — don’t run both.
7. Why local AI is non-negotiable for home
You should never, under any circumstances, give a cloud AI “Write” access to your home’s physical state. If a cloud provider has a breach, someone could potentially unlock your front door.
By using OpenClaw on a Mac mini, the “Keys to the Kingdom” stay on your desk. Before you wire any agent into your home, work through our OpenClaw security and sandboxing guide — it is non-negotiable for anything that can touch physical devices. For maximum stability, always ensure you have an HDMI Dummy Plug installed so the macOS window server (which Home Assistant sometimes relies on for GUI-based integrations) never sleeps.
8. Final verdict: The hub you deserve
Building an “Opinionated Home” is the ultimate expression of the OpenClaw Revolution. It takes the power of a world-class AI and puts it to work in the space where you live. For the cost of a Mac mini and a few SkyConnect bridges, you are essentially hiring a full-time butler who never sleeps and values your privacy above all else.
The key mindset shift: this isn’t a smart home product you buy. It’s a system you build and teach. The first month involves patience — configuring, testing, and adjusting as you discover which automations actually fit your household’s rhythm and which fire at the wrong moments. The payoff comes in month two and beyond, when the system starts running reliably in the background and you stop thinking about it entirely. A home that just works, without cloud subscriptions, without skill revisions, without Alexa misunderstanding you at dinner — that’s the end state worth building toward.
Pros
- Works completely offline — automations run even when the internet is down
- Reasoning engine replaces dozens of fragile if-this-then-that rules
- Presence-aware context means automations reflect real life, not rigid schedules
- Energy management workflows deliver measurable savings on monthly bills
- Privacy-first: your home's behavioral data never leaves your house
Cons
- Initial setup requires technical comfort: Docker/VM, YAML, SSH, token management
- Zigbee/Matter device compatibility research needed before buying hardware
- AI agents make mistakes — critical systems like locks need a manual confirmation step
The integration of OpenClaw and Home Assistant is the gold standard for home automation in 2026. It is secure, private, and offers a level of proactive intelligence that cloud-based ecosystems simply cannot match.
📌 FAQ – Common questions
Do I need a separate Mac for Home Assistant and OpenClaw?
What happens if the internet goes out?
Is Matter really ready in 2026?
Can the agent control smart locks automatically?
How do I prevent the agent from triggering automations when I'm just testing?
What's the best entry-level Zigbee device to start with?
Keep this in your inbox
One email a week: what we actually watched, built and reviewed — the stuff worth a dad's time. No hype, no daily spam.
Dadnology Weekly
One email a week: the LEGO, gaming and movie news worth a dad's time — plus what we actually reviewed. No hype, no daily spam.
Disclaimer: This review and its visuals were created with the help of AI. Some links may be affiliate links – we may earn a commission if you make a purchase, at no extra cost to you.
Current deals in Tech & gadgets
Verified live discounts tracked on Amazon

Tech & gadgets · Tested by Dadnology
Apple AirPods Pro (3rd generation)
5/5“The best noise-cancelling earbuds for Apple families”Read our review
Tech & gadgets · Tested by Dadnology
Samsung T7 Shield 2TB
5/5“Small, fast, and genuinely hard to break”Read our review
You might also like
Hermes Agent's Quicksilver release: What's new in v0.19.0
Hermes Agent shipped v0.19.0 (the Quicksilver Release) on July 20 — an 80% faster cold start, Bitwarden and 1Password integration, and a real security hardening pass.
Hermes Agent hardware requirements: The 24GB sweet spot explained
The real Hermes Agent hardware requirements for running Qwen 3.6 27B locally: why agents need more memory than chatbots, the 24GB sweet spot, and what to buy.

OpenClaw 2.0 is out: Team features, and a real security warning
OpenClaw 2.0 just shipped with team collaboration and a new browser UI - but sandboxing is disabled by default, and that matters if you're running it at home.